AWS EC2 Instance Metadata - Hands-On
This hands-on lab walks through executing terminal-level IMDS queries inside an Amazon Linux 2023 environment.
Hands-On
Phase 1: Launch the Hardened Node
- Navigate to your EC2 Dashboard and click Launch instance.
- Instance Name:
DemoEC2. - AMI: Choose Amazon Linux 2023 AMI. This image has IMDSv2 enabled by default.
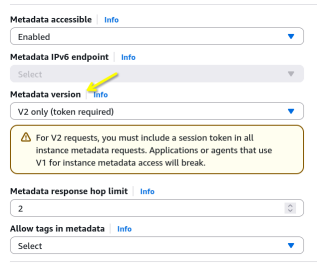
- Key Pair: I'll use an existing key pair, you can opt out if you don't have one and use web browser console
- Network Settings: Create a new SG that permits incoming SSH traffic from anywhere
- IAM Instance Profile: Leave this completely blank for now, we'll inject a role mid-lab to monitor live configuration state changes.
- Scroll to the bottom and click Launch instance. Connect to your instance via SSH or the web console terminal.
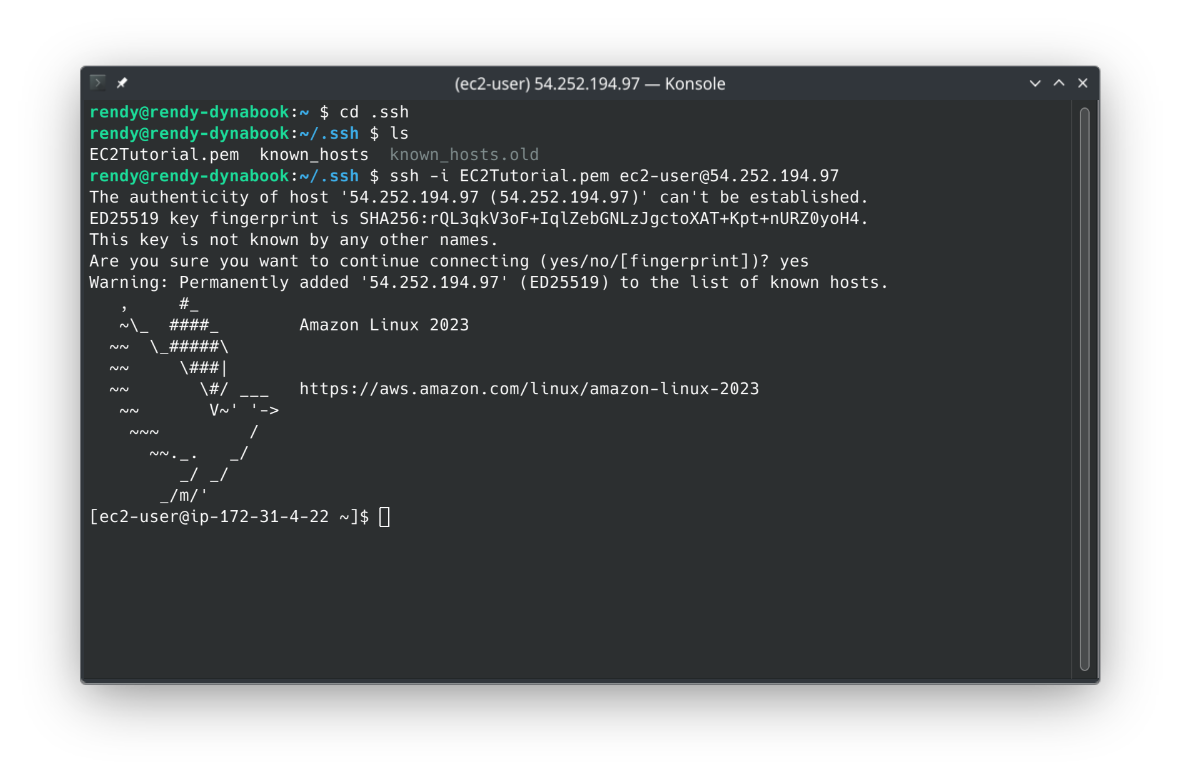
Phase 2: The Direct Request Failure (IMDSv1 Audit)
- Once inside the terminal, test a naked, unauthenticated stateless HTTP request against the link-local IP:
curl http://169.254.169.254/latest/meta-data/
- Result: No response, this is because Amazon Linux 2023 blocks IMDSv1 requests by default.
Phase 3: The IMDSv2 Secure Token Handshake
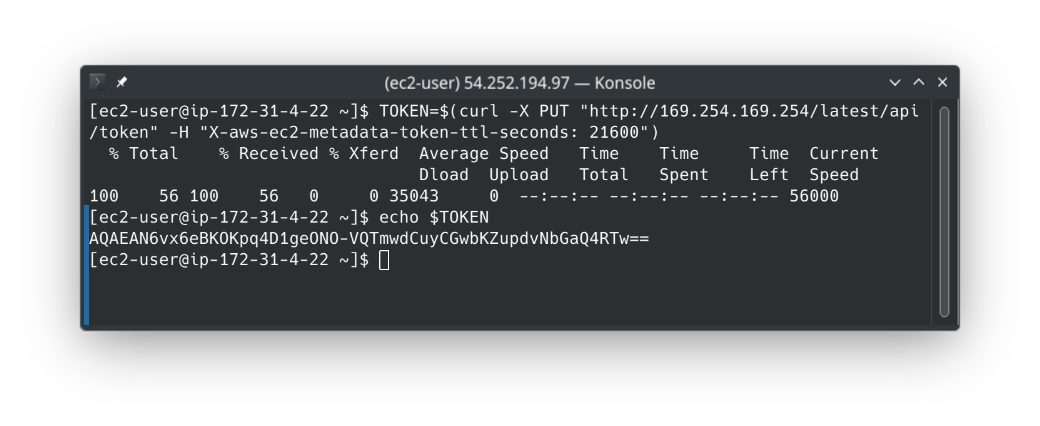
- Step 1: Mint a session token. Execute an HTTP
PUTrequest and store it in a variable:
TOKEN=$(curl -X PUT "http://169.254.169.254/latest/api/token" -H "X-aws-ec2-metadata-token-ttl-seconds: 21600")
-
Step 2: Inspect the active token
-
Step 3: Query the Active Metadata Manifest. Fire your
GETquery back to the metadata root path, but this time inject your variable string inside the mandatory custom authorization header block:
curl -H "X-aws-ec2-metadata-token: $TOKEN" http://169.254.169.254/latest/meta-data/
- Result: The terminal cleanly spits out the entire base metadata directory map!
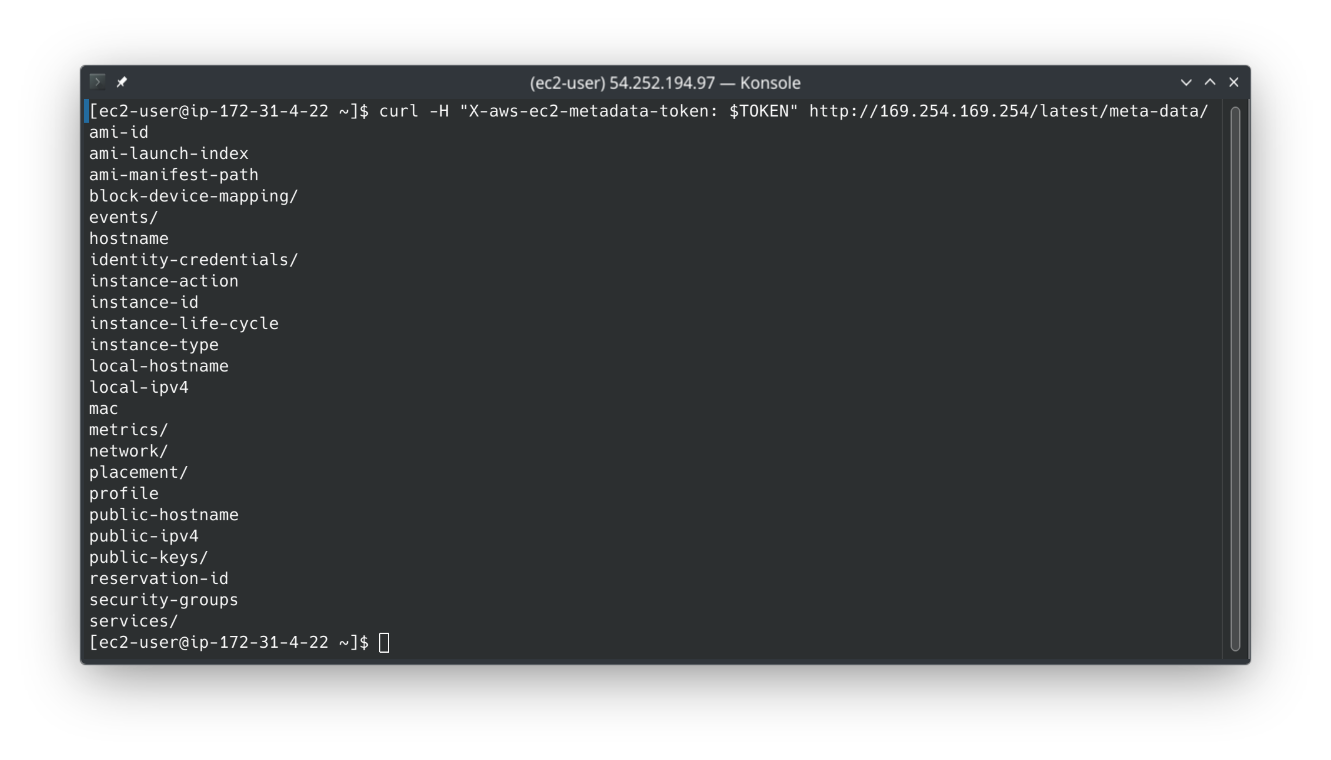
- Console Directory Tip: Trailing forward slashes inside the response string (like
network/) indicate sub-directories packed with more keys. Raw strings without slashes (likeami-id) represent terminal value readouts. - Step 4: Target Specific Environment Specs. Append downstream key targets to the resource query path string to extract standalone environment parameters:
- Fetch the local server hostname
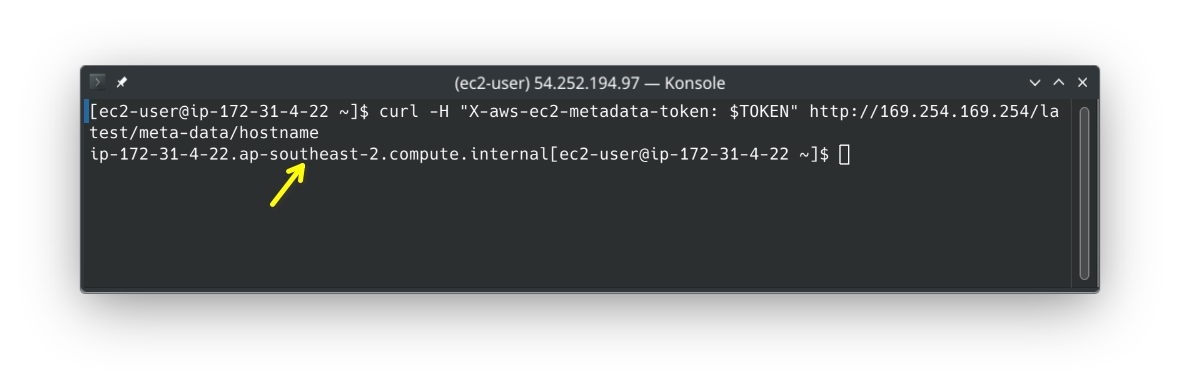
- Fetch the internal private IPv4 address
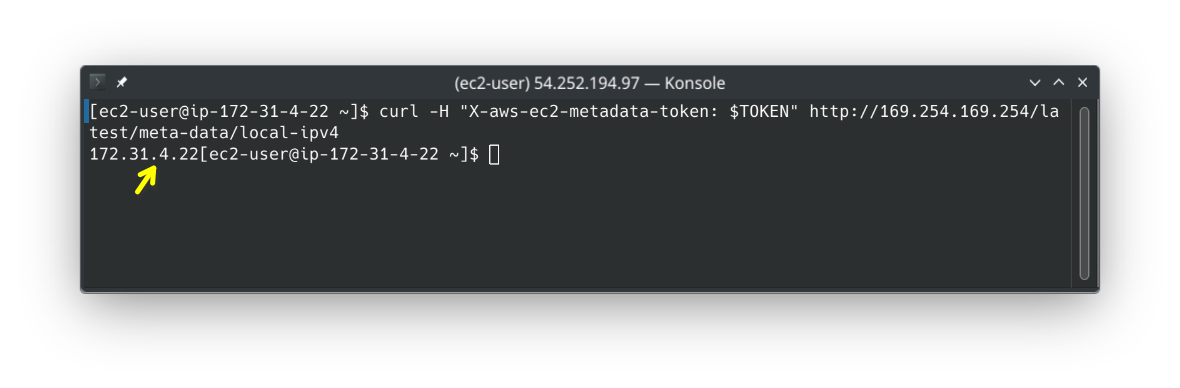
- Fetch the local server hostname
Phase 4: Dynamic IAM Profile Injection
- Run a deep path query targeting the local credential directory loop:
curl -H "X-aws-ec2-metadata-token: $TOKEN" http://169.254.169.254/latest/meta-data/identity-credentials/ec2/security-credentials/
- Result: I got a response. This is because the EC2 instance was launched with a default, auto-generated IAM Instance Profile role that AWS tucks in behind the scenes. However in the hands-on lab environment, Stephane got an error, I think in previous versions of Amazon Linux 2023, the auto-generated role was not included by default. If you don't see a response, you can create a new IAM Role with EC2 permissions and attach it to your instance mid-flight to trigger this response:
- Open your AWS EC2 console, and select your
DemoEC2instance. - CLick Actions → Security → Modify IAM Role.
- Attach any existing valid runtime role profile from your account dropdown list and click Update IAM Role
- Open your AWS EC2 console, and select your
- The Terminal Output: S3/EC2 dumps a full JSON configuration block carrying a live
AccessKeyId, aSecretAccessKey, a temporaryTokenstring, and an expiration timestamp indicating the key's life window (typically rotating every 1 hour).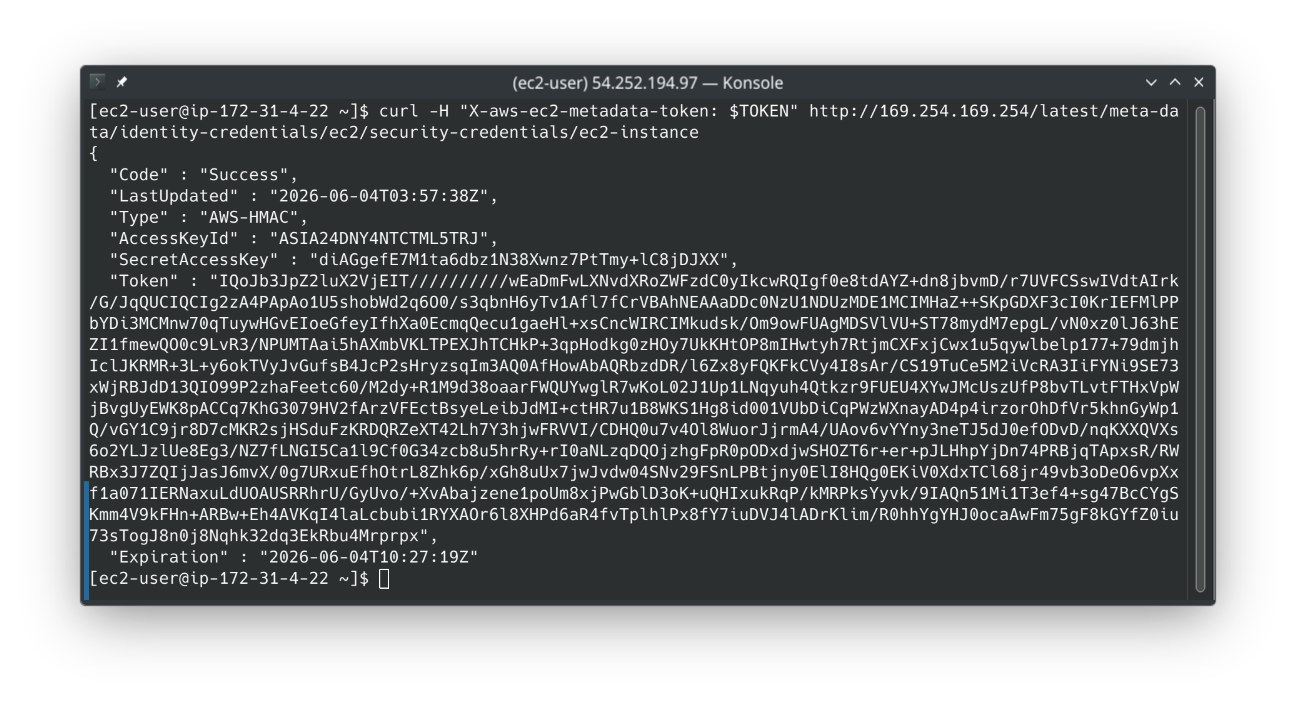
- Clean Up: Once you are done, go ahead and Terminate your EC2 instance to avoid any stray billing overhead.