DynamoDB Basics - Hands On
This hands-on lab exposes the absolute core reality of building serverless tables. You've probably had to run dangerous database migrations or ALTER TABLE scripts just to add a new column to a relational schema. With DynamoDB, your storage engine doesn't care. One item can have an age attribute, another can have a last_name, and the engine handles it natively without breaking a sweat.
🛠️ Step-by-Step DynamoDB Base Table Hand On
1. Provisioning Custom Throughput Parameters
- Step 1: Declare the Namespace and Identity Key
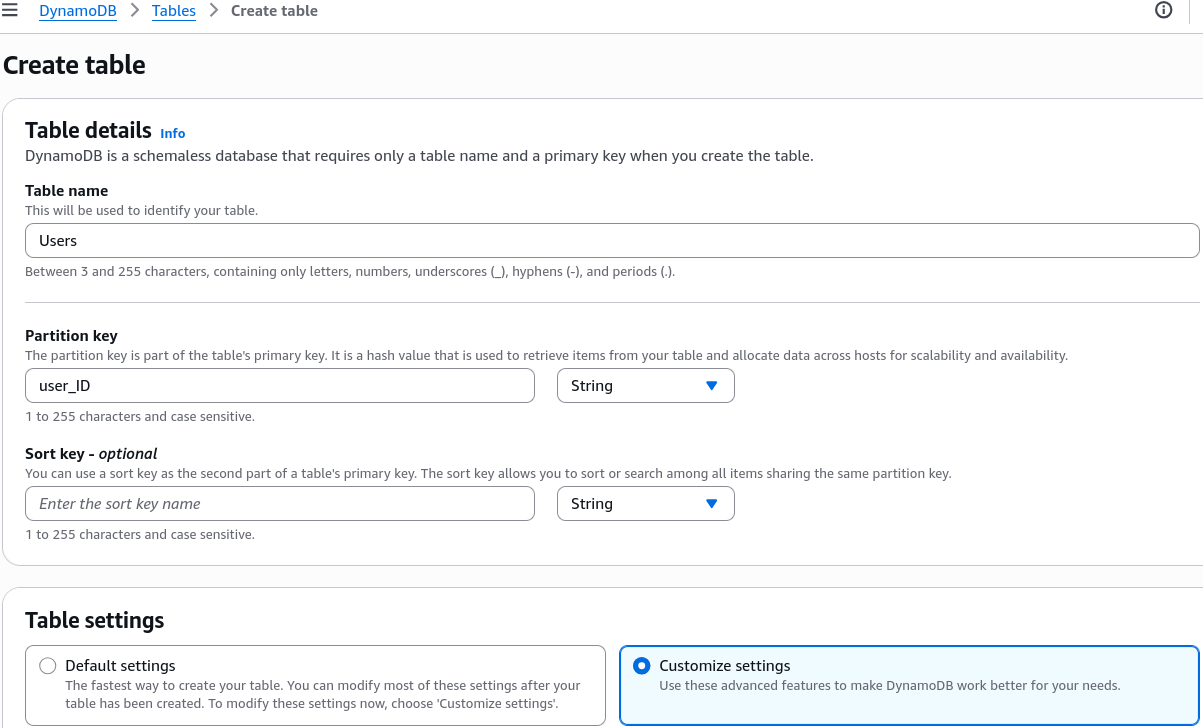
- Jump into the DynamoDB Console ──► click Create table.
- Table Name string:
Users - Partition Key (PK) attribute:
user_ID(Leave type as String).
-
Step 2: Strip Down Auto Scaling (Free Tier Optimization)
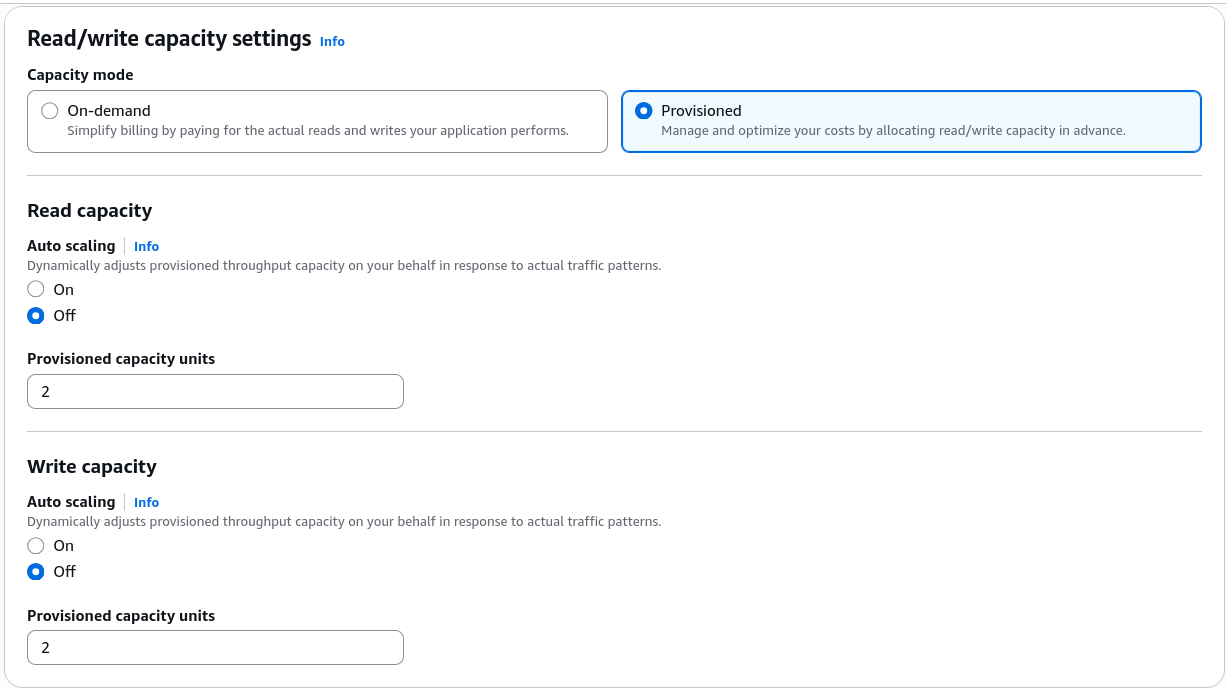
- Toggle the configuration settings button from Default settings over to Customize settings.
- Maintain the DynamoDB Standard table storage class tier.
- Under Capacity Mode, select Provisioned capacity.
- Turn Auto scaling to Off for both Reads and Writes, and manually clamp the capacity knobs down to:
- Note: Keep defaults for "Warm throughput".
-
Step 3: Establish the Disk Layer Encryption
- Keep encryption at rest locked to the default Owned by Amazon DynamoDB (DEFAULT) key wrapper to save on AWS KMS invoice lines, chief. Click Create table.
2. The Schemaless Mutation Validation Lab
Once the table status switches to a green Active indicator block, open the table dashboard ──► select Explore table items ──► hit Create item.
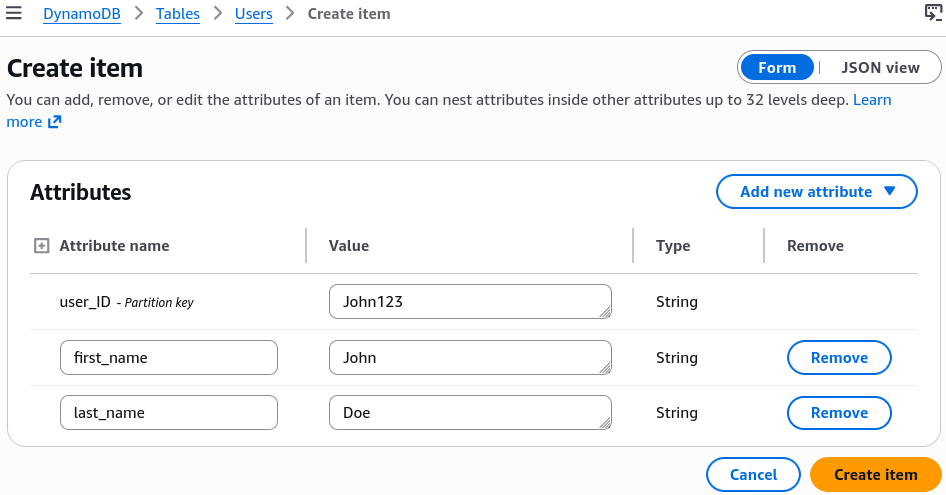
Item Mutation A: The Complete Schema Model
- Input your
user_IDvalue string as:John123 - Click Add new attribute ──► select String ──► Key:
first_name, Value:John - Click Add new attribute ──► select String ──► Key:
last_name, Value:Doe - Hit Create item. The item updates perfectly into the disk partition.
Item Mutation B: The Collision Crash
- Click Create item again ──► attempt to drop
John123as theuser_IDprimary signature a second time. - The Collision Result: Even if you change the attributes or provide a completely new name string, clicking save will overwrite your previous record! Because you chose a simple Partition Key layout, the
user_IDhash must remain 100% unique across the entire table!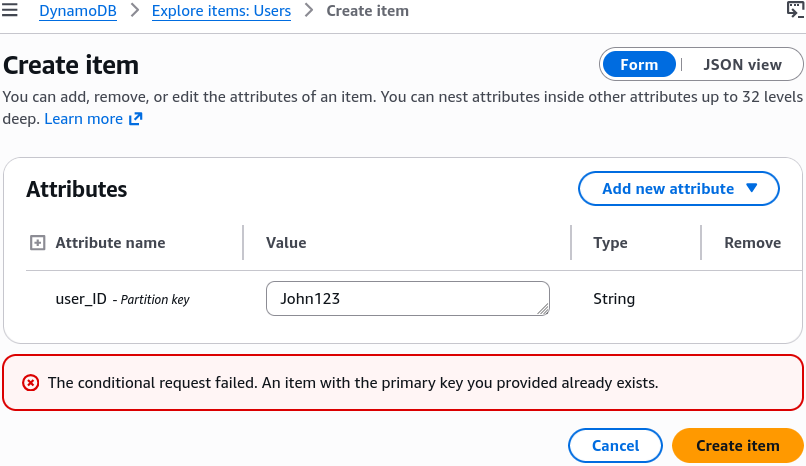
Item Mutation C: The Heterogeneous Data Model Injection
- Click Create item ──► Input a unique
user_IDhash signature string:Alice456 - Click Add new attribute ──► select String ──► Key:
first_name, Value:Alice - Click Add new attribute ──► select Number ──► Key:
age, Value:41 - Notice the Delta: We completely leave out the
last_namestring attribute! Click Create item. - The engine commits the row flawlessly. In the UI data grid layout view, John carries a blank space marker placeholder string for
age, and Alice carries a blank space marker string forlast_name. This proves DynamoDB tables are natively schemaless, bro!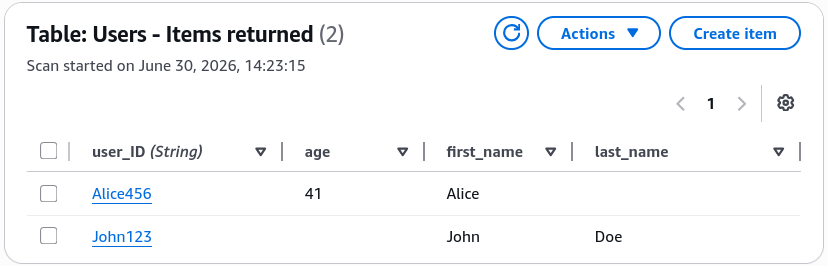
3. The Composite Secondary Table Setup (PK + SK)
Let's look at how adding a chronological timeline parameter transforms your data capabilities, chief. Jump right back to Create table:
- Table Name:
UserPosts - Partition Key (Hash):
user_ID(String) - Sort Key (Range):
post_TS(String - for ISO 8601 string timestamp layouts like2026-06-30T13:11:54Z) - Match the custom provisioned capacity configurations (
2 RCUs / 2 WCUs) and click Create table.
The Composite Data Commit Loop:
Navigate to your new UserPosts table items view ──► click Create item. Now you are forced to supply both target identity strings:
Item Entry 1:
  - user_ID (PK) : John123
  - post_TS (SK) : 2026-06-30T10:00:00Z
  - content      : "Hello world, this is my first blog, bro!"

Item Entry 2:
  - user_ID (PK) : John123
  - post_TS (SK) : 2026-06-30T11:30:00Z
  - content      : "Second post yay!"
- The Validation Success: Both item blocks commit to the disk array successfully! Even though the Partition Key matches, because the Sort Key strings are unique, the composite
PK + SKprimary key criteria is perfectly satisfied.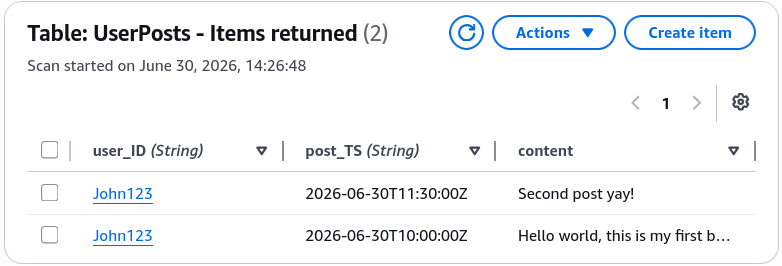
📊 Operational Telemetry Partition Math
The underlying physical drive location mapping and composite storage distribution verified during this hands-on lab evaluate under these clear path expressions:
Exam Tips
- The Date/Time Partition Trap: As Stephane warned at the end, if
John123is a celebrity user who publishes 50,000 posts an hour, and 99% of your application's transaction activity centers entirely on him, yourUserPoststable will experience severe Hot Partitioning issues. All of John's items will cluster onto the exact same physical background partition drive based on hisuser_IDhash value. To optimize for high-throughput scaling scenarios, you must choose high-cardinality keys or append synthetic random suffix values to balance your workloads evenly across the cloud architecture.