CodeCommit Hands On Part 1
Stephane’s walkthrough shows you exactly how to manipulate the repository dashboard, drop files in via the UI, and map out automated background notification alerts using Amazon SNS.
Hands On
📁 1. Creating the Code Repository Runway
- Launch the Terminal Console: Open the AWS Management Console and pull up the CodeCommit workspace (which houses CodeCommit, CodeBuild, CodeDeploy, and CodePipeline under a single sidebar umbrella).
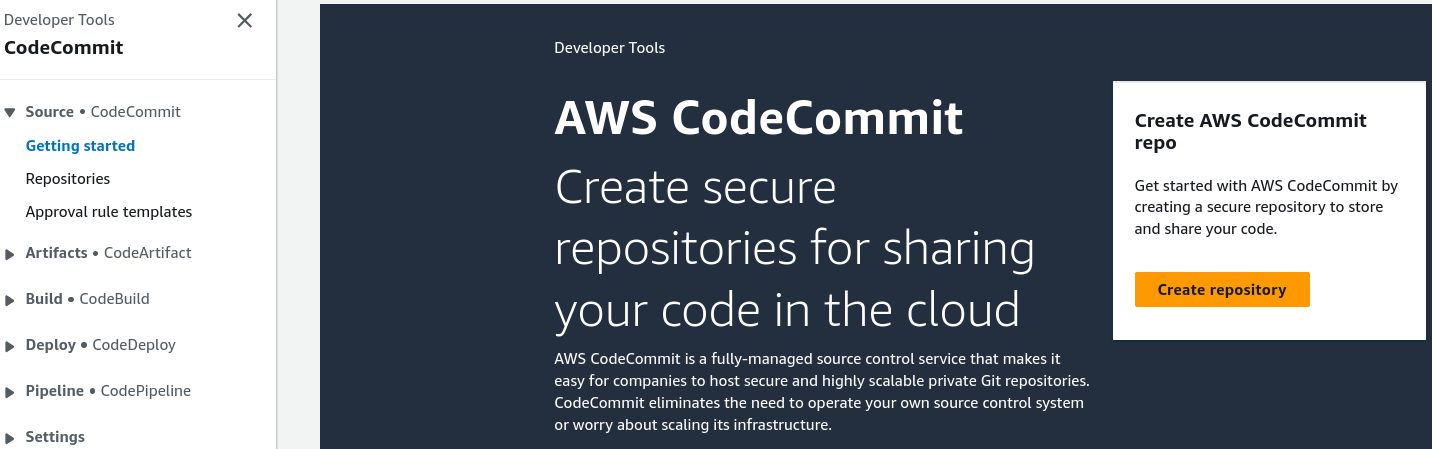
- Provision the Repo: Hit Create repository, give it a clean name like
my-nodejs-app, and click create. - The Identity Connection Catch: The landing page reveals your primary connection string routes: HTTPS, SSH, or HTTPS GRC. Console Hook: If you don't see the SSH connection tab available, it means you're logged into the AWS console using the unsecure Root account instead of a properly configured, isolated IAM User, chief!
📝 2. Committing Files Directly via Web UI
- Upload Your Baseline Code: Inside the code view pane, click Add file ──► select Upload file.
- Stage Your Asset: Choose a standard file target (like an
index.htmllayout file). - Sign the Git Commit Envelope: Provide your Author Name (e.g.,
Rendy), add an Email Address, and type a clean commit message likeinitial commit. - Bake the Artifact: Click Commit changes. CodeCommit automatically generates a unique, immutable cryptographic Commit ID and spins up your default primary tracking branch, named
main.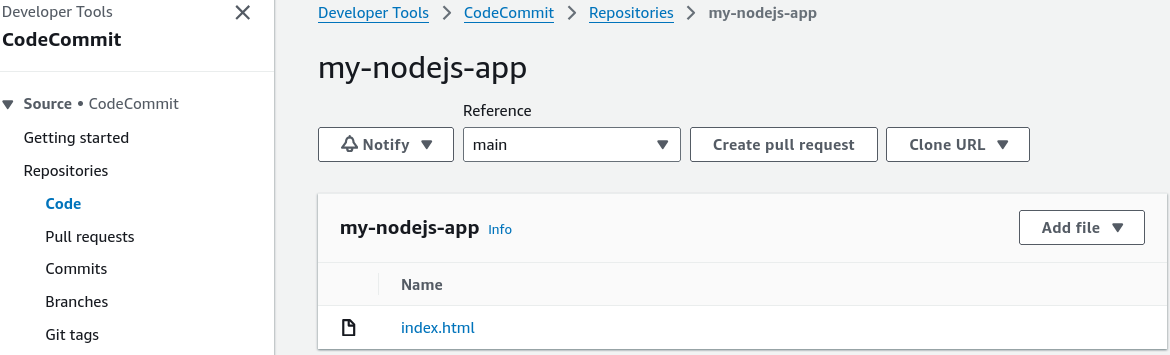
🎛️ 3. Establishing Automated Event Gatekeepers
CodeCommit packs two powerful management tools inside the Settings sidebar to track background infrastructure mutations, bro:
📣 Track A: Notification Rules (The Global Ledger)
- The Intent: Designed to log high-level pull requests or developer coordination movements directly to an SNS topic or Slack/Ms.Teams workspace.
- The Playbook Steps:
- Navigate to Settings (left sidebar) ──► click Notifications ──► hit Create notification rule.
- Name it
DemoNotificationRuleand toggle the Detail Type to Full to capture complete execution attributes. - Check the box to Select all events (captures master branch switches, code pull request approvals, deletes, and tag updates).
- Create or select an target Amazon SNS Topic (AWS applies the mandatory
codestar-notifications-*namespace filter automatically) and hit submit to bind the rule.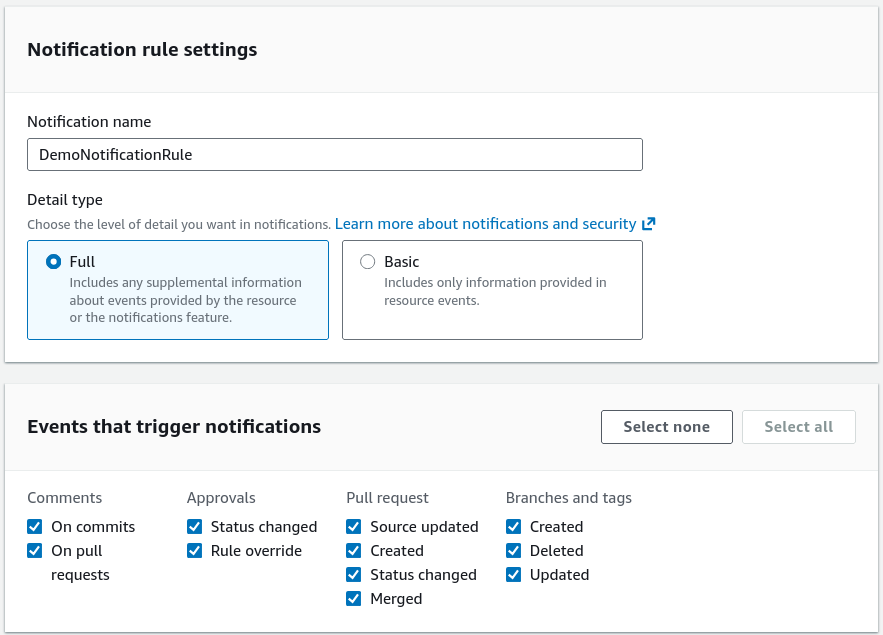
⚡ Track B: Repository Triggers (The Core Code Hooks)
- The Intent: Purpose-built to respond natively to direct code events—like a hard
push to an existing branch. This is exactly how you automatically fire up external build environments or ping Lambda functions when code changes! - The Playbook Steps:
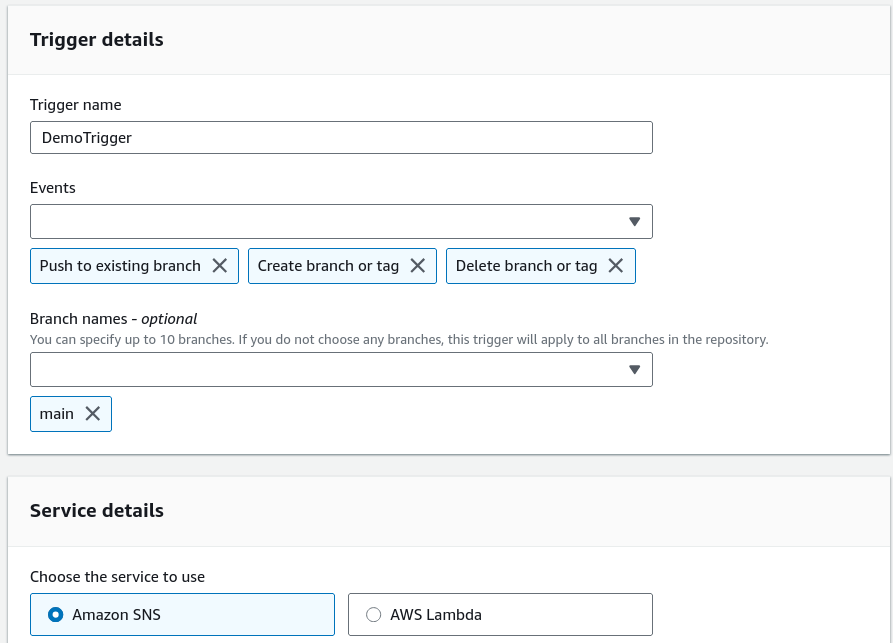
- Go to Settings ──► click Triggers ──► hit Create trigger.
- Name it
DemoTriggerand set the event targets strictly to Push to existing branch. - Declare the exact tracking target branch parameter name:
master. - Select Amazon SNS as your service destination, link it directly to your existing communication topic ARN, and hit save.
Exam Tips
- The Code Review Governance Loop: Remember for multi-choice scenarios that CodeCommit natively handles Pull Requests and Approval Rule Templates. If a question asks how to mandate that at least two senior developers must digitally sign off on a piece of code before it is allowed to merge into production—you don't write custom script logic. You configure an Approval Rule Template and bind it right to your master branch!
- The Root Account SSH Absence: Pay close attention to that console warning! If you log in using your main AWS Root account, the SSH Keys upload dashboard will be completely missing from your security profile credentials tab. AWS blocks this on purpose. You must always use a dedicated IAM User to map your cryptographic terminal handshakes.