CodeDeploy Hands On
Stephane’s walkthrough exposes a critical architectural truth: CodeDeploy doesn't just copy files blind; it relies on strict cryptographic IAM trust boundaries, background operating system runtime dependencies, and precise metadata filters to locate your virtual machines.
Hands On
🔐 1. Forging the Dual IAM Security Pillars
Before you touch a single server or deployment console, you must build the underlying identity handshake gates, chief:
- The Service Control Gate (Role A): Open the IAM Console ──► go to Roles ──► hit Create role.
- Select AWS service ──► choose CodeDeploy ──► select the use case variant matching CodeDeploy (Standard/EC2).
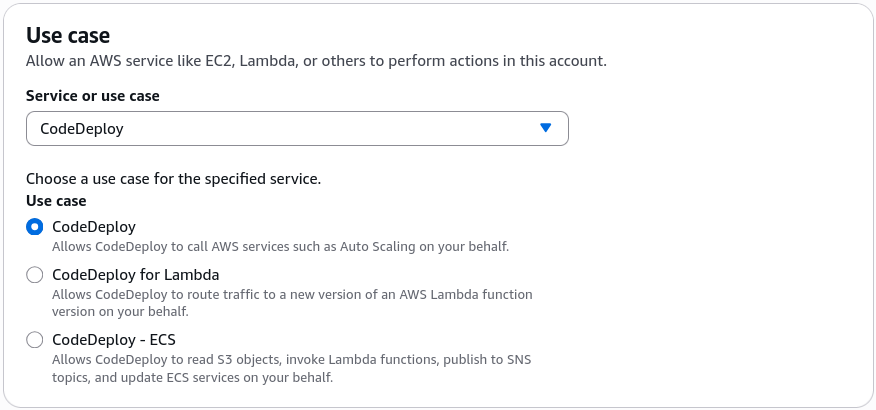
- Name the role explicitly:
CodeDeployServiceRoleForEC2and click create. (This grants the background CodeDeploy orchestrator permission to inspect your infrastructure boundaries.)
- Select AWS service ──► choose CodeDeploy ──► select the use case variant matching CodeDeploy (Standard/EC2).
- The Host Storage Fetch Gate (Role B): Hit Create role yet again ──► select AWS service ──► choose EC2.
- Under the permissions search bar, look for and attach
AmazonS3ReadOnlyAccessto the role. - Name this role:
EC2RoleForCodeDeployand click create. (This allows your virtual machines to securely reach out and pull deployment zips straight down from your S3 back-buckets!)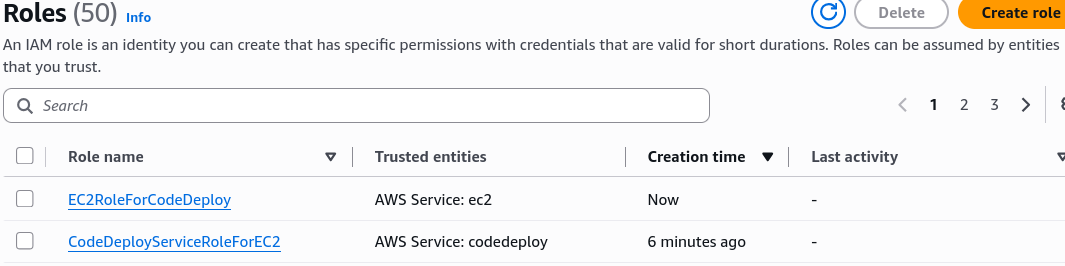
- Under the permissions search bar, look for and attach
🏎️ 2. Provisioning the Target Infrastructure Fleet
- Launch the Virtual Box: Navigate straight to the Amazon EC2 console dashboard ──► click Launch instance.
- Set the Host Specs: Name it
DemoWebServer──► keep the baseline OS pinned to standard Amazon Linux ──► leave the instance size configuration on t3.micro. - Open the Network Inbound Perimeters: Under Network Settings, check the box to Allow SSH traffic AND check the box to Allow HTTP traffic from the internet.
- Launch the Node: Click Launch instance (add a key pair if you have it handy or you can use CloudShell to connect later).
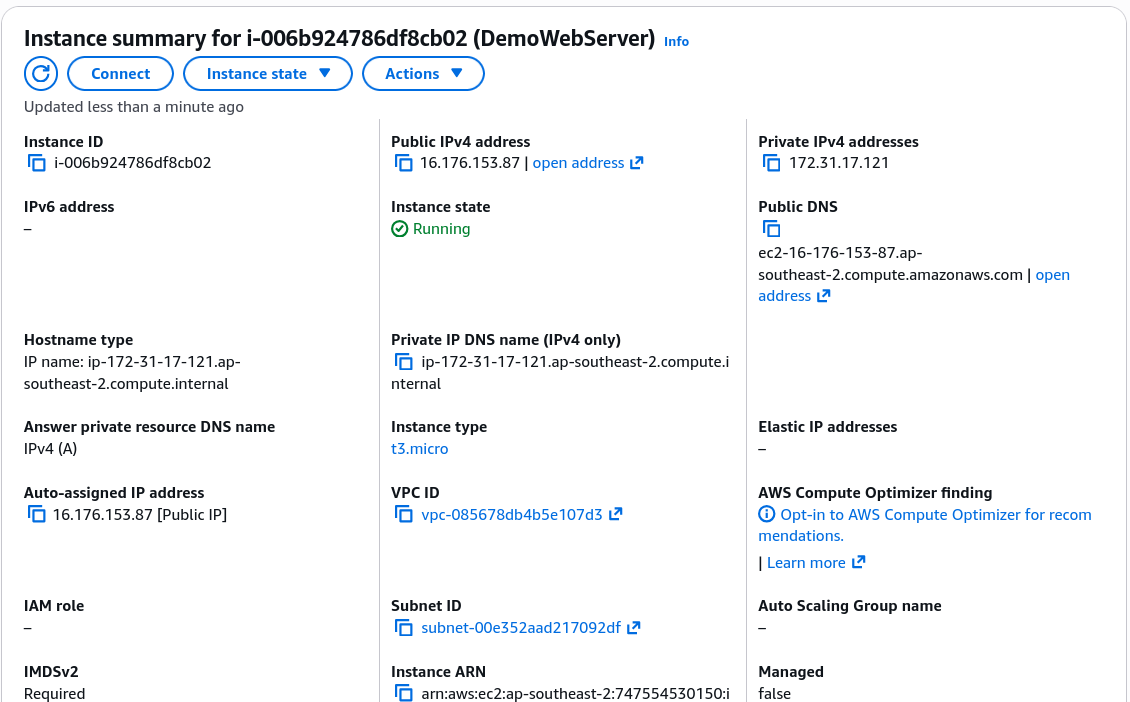
- 🚨 THE CRITICAL METADATA TAG AND SECURITY PATCH: To ensure CodeDeploy can find and operate this node, you must perform two rapid administrative tweaks inside your active instances view panel:
- Attach the Storage Fetch Identity: Check the box next to your instance ──► click Actions ──► Security ──► Modify IAM role ──► drop down the list, select
EC2RoleForCodeDeploy, and hit Save. - Attach the Group Target Tag: Click on your running instance details ──► go to the Tags tab ──► hit Manage tags ──► append a custom tracking tag: Set the Key to
Environmentand set the Value strictly toDevelopment──► hit Save.
- Attach the Storage Fetch Identity: Check the box next to your instance ──► click Actions ──► Security ──► Modify IAM role ──► drop down the list, select
🛠️ 3. Bootstrapping the Host Engine (The CodeDeploy Agent)
-
Establish a Live Terminal Line: Click into your active
DemoWebServerinstance dashboard layout ──► hit the top-level Connect button ──► select the EC2 Instance Connect tab ──► click Connect to pop open a live web terminal session. -
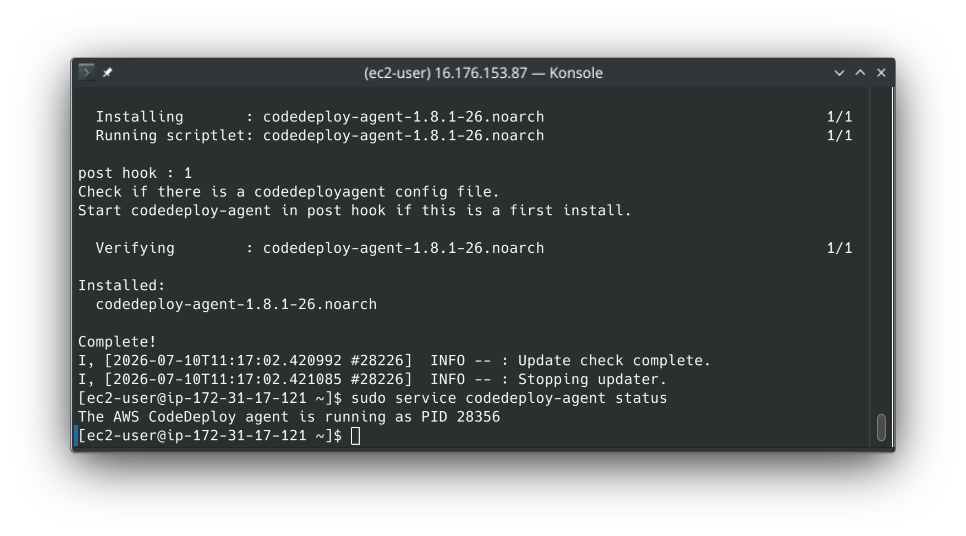
Execute the Bootstrap Instructions: Run these sequential Linux scripts down the wire to spin up the background runtime dependencies:
# Installing CodeDeploy Agentsudo yum updatesudo yum install ruby# Download the agent (replace the region)wget https://aws-codedeploy-eu-west-3.s3.eu-west-3.amazonaws.com/latest/installchmod +x ./installsudo ./install autosudo service codedeploy-agent status -
The Succeeded Check: The terminal will flash a bright active status payload showing a tracking Process ID (PID). Your server is officially armed and listening for cloud deployment runs.
📂 4. Staging the Deployment Blueprints inside Amazon S3
-
Create the Deployment Silo: Open the Amazon S3 console ──► click Create bucket ──► give it a globally unique descriptor like
rendy-code-deploy-demo-bucket. Critical Rule: Ensure your S3 bucket matches the exact identical AWS Region housing your EC2 and CodeDeploy environments, or the network handshake fails. -
Upload the Application Revision Bundle: Drop your compiled application zip archive (e.g., SampleApp_linux.zip) straight into the bucket.
-
The AppSpec Custom Hook Blueprint 📄: Under the hood, your unzipped application revision folder contains a mission-critical tracking file at its absolute root named
appspec.yml. This file dictates the exact directory file copies and handles custom shell script triggers inside sequential Lifecycle Event Hooks:BeforeInstall: Spins up custom scripts to pre-install dependencies (like configuring an Apachehttpdweb server engine).Install: CodeDeploy maps and copies files out of your zip artifact straight down into the target host directory path (e.g.,/var/www/html).ApplicationStart: Triggers scripts to execute a graceful boot loop on your service stack.ApplicationStop: Fires scripts to gracefully stop your service stack before a new deployment run.
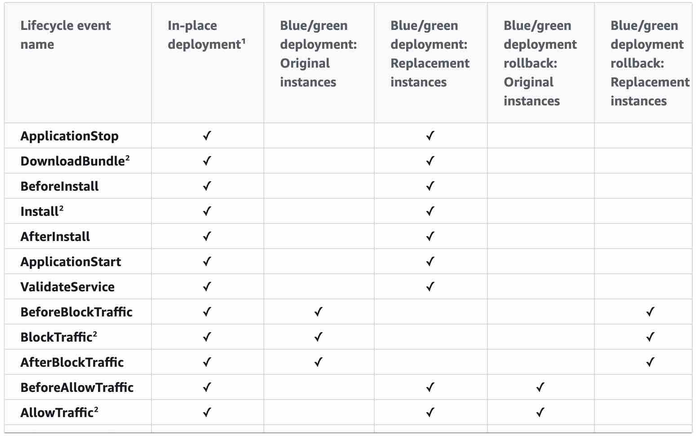 Full lifecycle hook documentation is available here: CodeDeploy Lifecycle Event Hooks.
-
Grab the Data Pointer: Click on your uploaded zip object inside the S3 dashboard and copy its unique S3 URI path string to your clipboard.
🎛️ 5. Creating the CodeDeploy Control Group
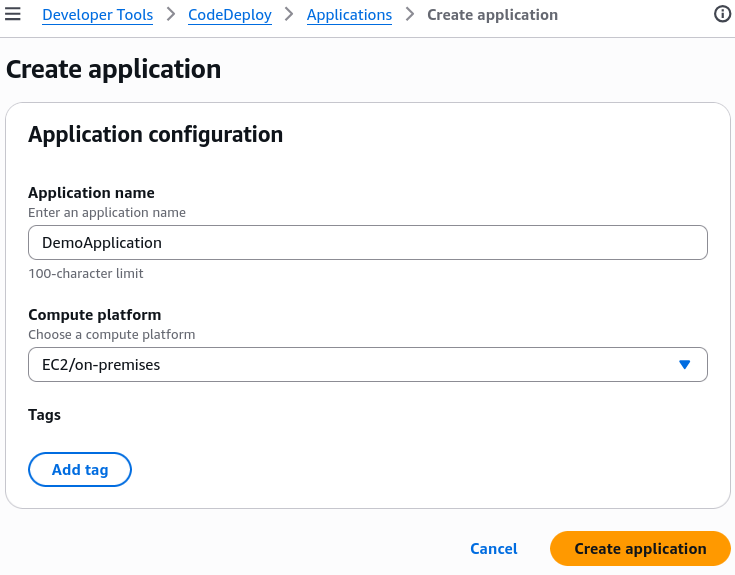
- Initialize the Application App Scope: Head back over to the CodeDeploy console workspace ──► click Applications ──► hit Create application ──► name it
DemoApplication──► set the Compute Platform dropdown parameter strictly toEC2/on-premises.
- Forge the Target Deployment Group: Click into your newly created application profile ──► click Create deployment group:
- Name the group target:
DevelopmentInstances. - Set the Service Role dropdown to your pre-staged:
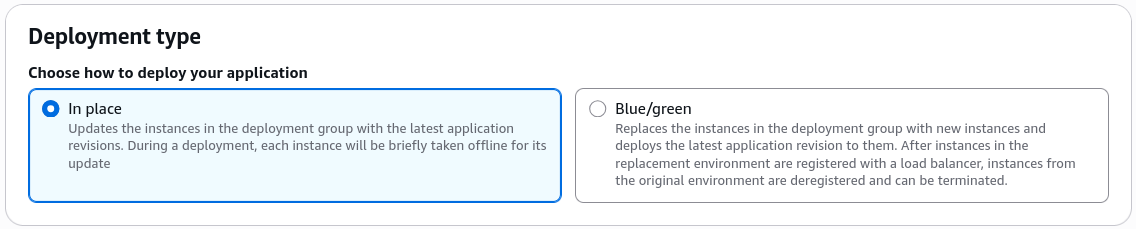
CodeDeployServiceRoleForEC2. - Set the Deployment Type selection to:
In-place.
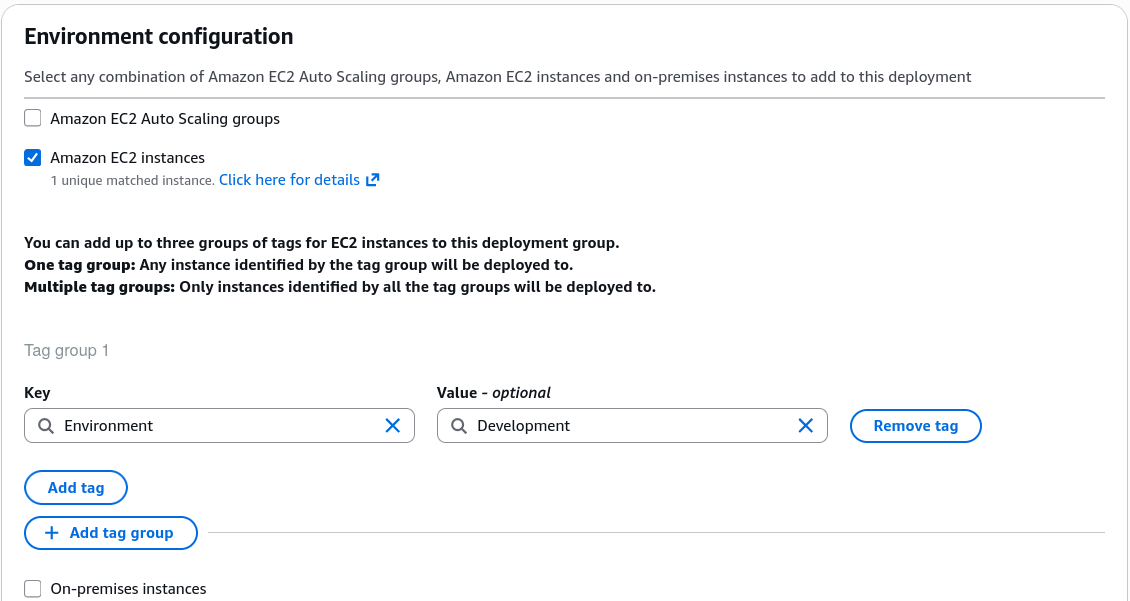
- Under Environment Configuration, check the box for
Amazon EC2 instances. - The Metadata Filtering Step: Under the tag group parameters, set the Key to
Environmentand set the Value toDevelopment. The console will instantly scan your active cloud fleet and update its readouts to state:1 unique matched instance found.
- Set Agent Installation options to: Never.
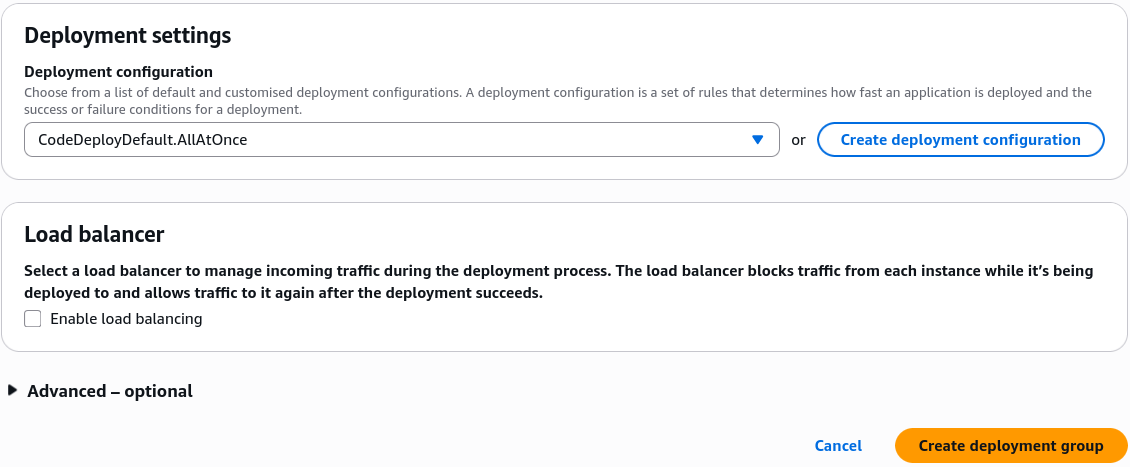
- Set Deployment Configuration options to:
CodeDeployDefault.AllAtOnce. - Uncheck the box to Enable Load Balancing (since we are proxying straight to a single standalone server for this sandbox testing run) ──► click Create deployment group.
- Name the group target:
🚀 6. Triggering the Deployment Rocket Launch
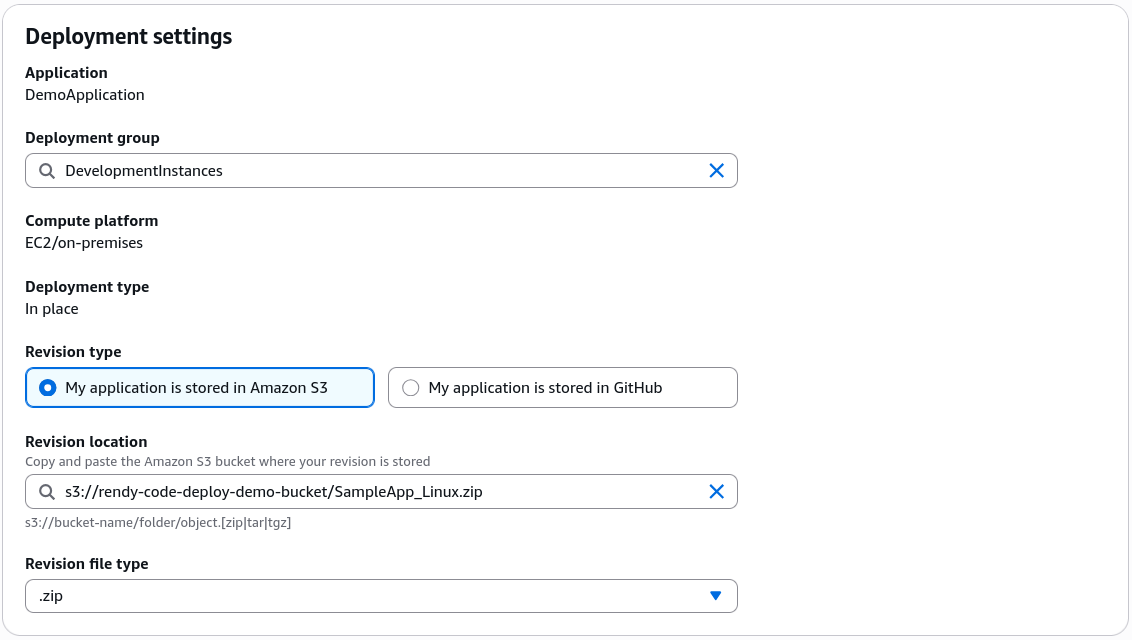
- Fire the Code Payload: Inside your active deployment group view panel, look to the actions row on the top right and click Create deployment.
- Reference the Target Build Archive: Keep the settings pointed to your
DevelopmentInstancesgroup ──► set the Revision Type dropdown to My application is stored in Amazon S3 ──► paste your copied S3 URI path string right into the tracking target box ──► click Create deployment.
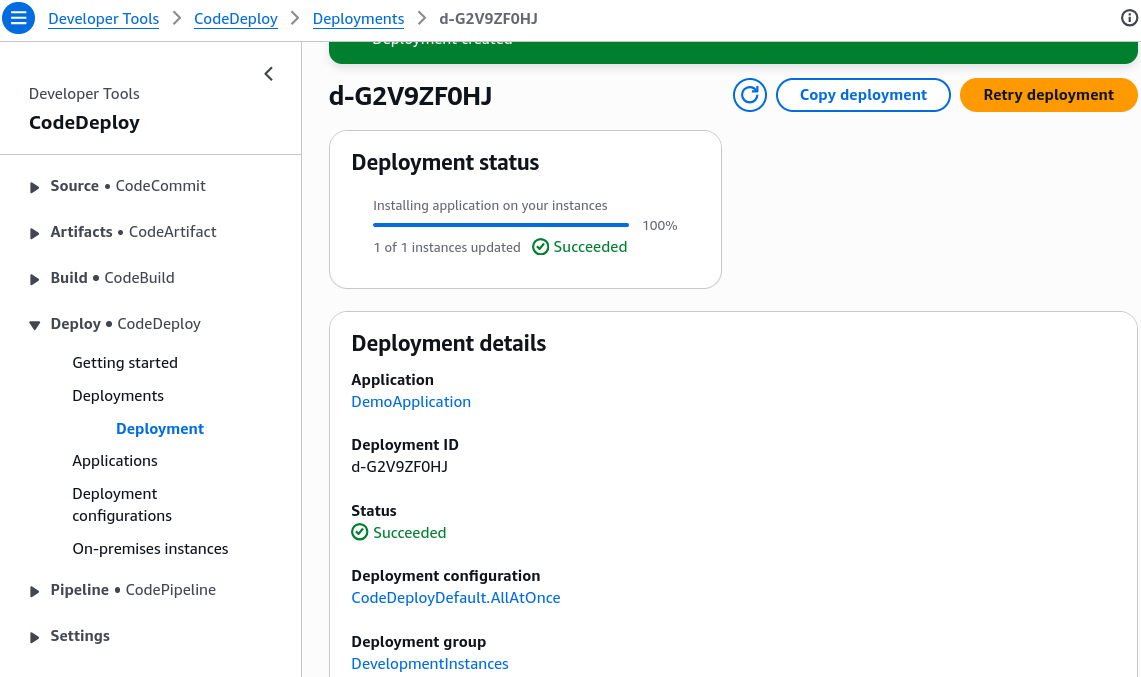
- The Live Diagnostics Rollout: The deployment transitions instantly to an active execution timeline. Click View events to watch the background CodeDeploy agent systematically grab your zip bundle, fire your installation lifecycle hook scripts, drop the files, and boot your Apache server.
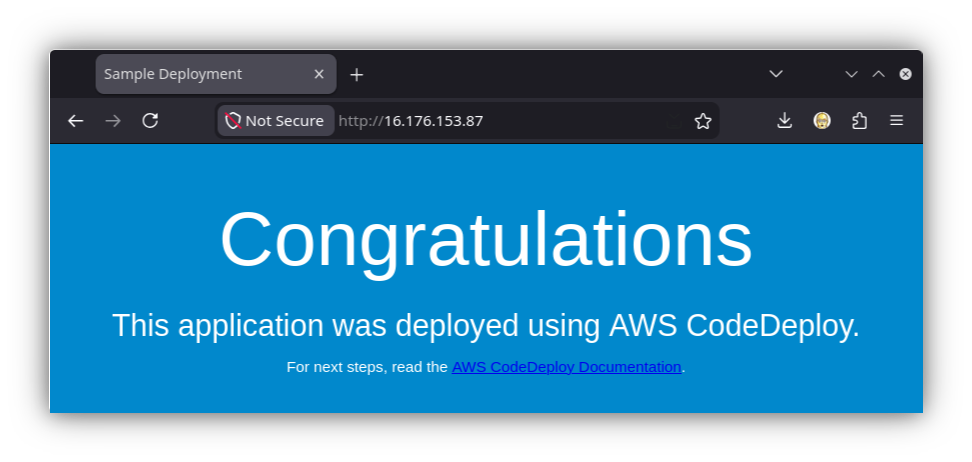
- The Victory Lap Check 🏆: Copy the raw public IP address of your EC2 instance node from the dashboard, paste it into a fresh browser URL line prefixing it with a raw
http://call, and hit enter. The page loads instantly with a glorious banner text stating: "Congratulations! This application was deployed using AWS CodeDeploy".
🛑 7. Absolute Final Clean-Up Reminder
Do not forget to head right back over to your Amazon EC2 dashboard console, select your running DemoWebServer test box, hit instance state, and click Terminate instance. This instantly wipes out the virtual box and stops all background AWS compute billing meters completely.