CodePipeline - Hands On
We'll be creating out first multi-stage automated enterprise pipeline. Seeing those rolling environment updates march forward while a strict manual gatekeeper guards your production cluster is the absolute golden standard of modern DevOps engineering.
Hands on
🎛️ 1. Orchestrating the Core Control Blueprint
- Initialize the Pipeline Runway: Launch the CodePipeline console workspace ──► click Create pipeline ──► choose Build custom pipeline and name it
MyFirstPipeline──► leave the execution mode set to Queued. - The Service Role Privilege Handshake: Select New service role to let AWS automatically generate the foundational IAM permissions envelope.
- 🚨 THE CORE PRODUCTION ELEVATION PATCH: Before proceeding, you must ensure the pipeline can actually talk to your target servers. Open the newly generated pipeline service role in the IAM console ──► hit Attach policy ──► search for and append
AWSElasticBeanstalkAdministratorAccessdirectly to the role. Console Hook: If you skip this critical step, the pipeline will pull your code but throw a hard permissions collision the exact microsecond it tries to touch your Beanstalk clusters.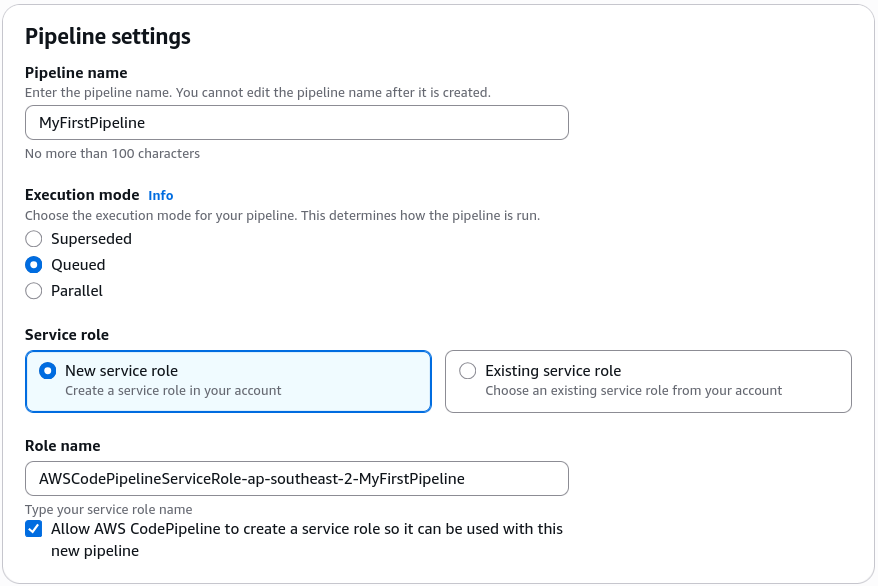
📁 2. Securing the Inbound Pipeline Hook (Source Step)
- Target the Source Provider: Set the Source Step action provider dropdown to GitHub (via Github App).
- Establish the Secure Web Access Tunnel: Click Connect to GitHub ──► name your pipeline connection asset
MyGitHubConnection──► hit authorize to approve the native AWS Connector handshake.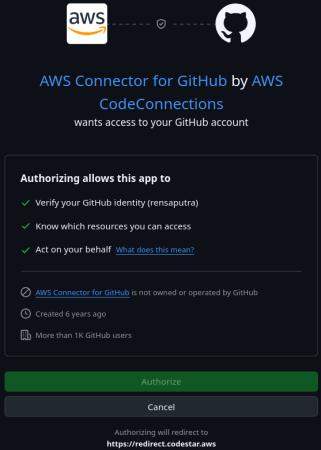
- Configure App Scopes: Click Install a new app ──► select your target personal/corporate GitHub workspace account ──► select your repository target (
my-nodejs-app) ──► click connect to flip the connection status to Available.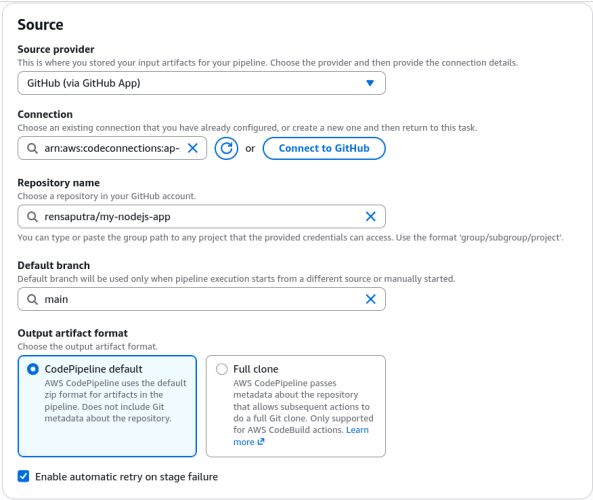
- Establish the Change Filter Trigger: Select your primary tracking branch (e.g.,
mainormaster) ──► verify that the output format uses the CodePipeline default schema ──► confirm that a native push filter rule is assigned to watch your target branch.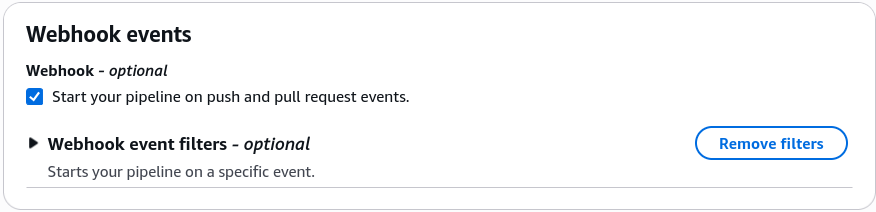
- Bypass the Initial Compilation Step: For this simple web layout, click Skip build stage and Skip test stageto jump straight over the deploy stage for now.
🚀 3. Hooking Up Lower-Tier Deployments (Dev Stage)
- Target the Deploy Provider: Set the Deployment provider dropdown strictly to AWS Elastic Beanstalk.
- Lock in the Dev Target Environment: Select your global application container umbrella name ──► choose your baseline playground workspace identifier (
devor your standard active environment) ──► hit Next ──► click Create pipeline.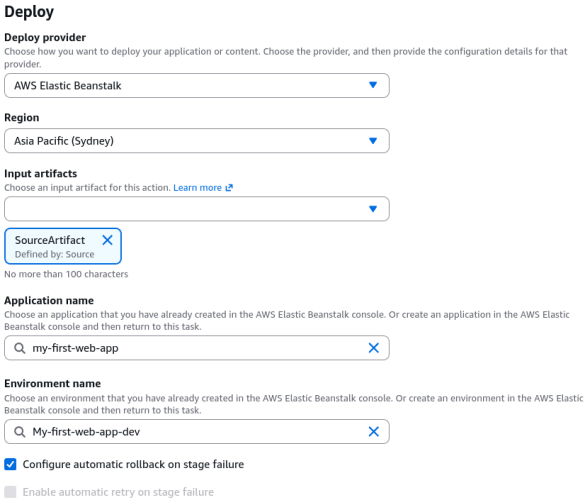
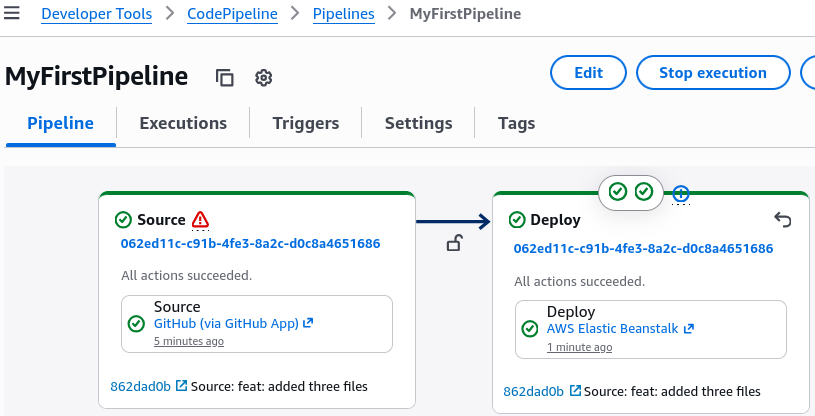
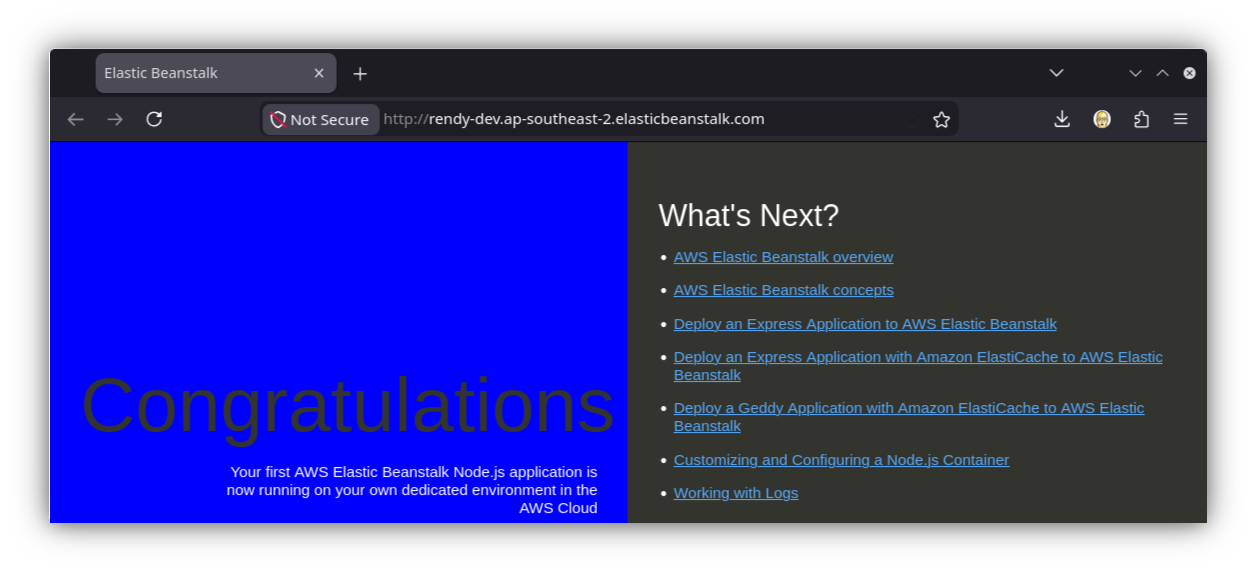
- The Automated Delivery Execution: The moment the setup wizard closes, CodePipeline instantly wakes up, executes a background API call to extract your repository code zip file, stores it as an Input Artifact inside an underlying S3 bucket, and pushes it directly down to your Dev Beanstalk instance to turn the background server page a clean blue layout.
🛡️ 4. Hardening the Edge Line with Multi-Stage Progression (Prod Stage)
- Enter the Layout Designer: Inside your active pipeline view panel, hit the top-level Edit configuration utility ──► scroll to the bottom of the canvas ──► click Add stage ──► name this secondary target block
DeployToProd.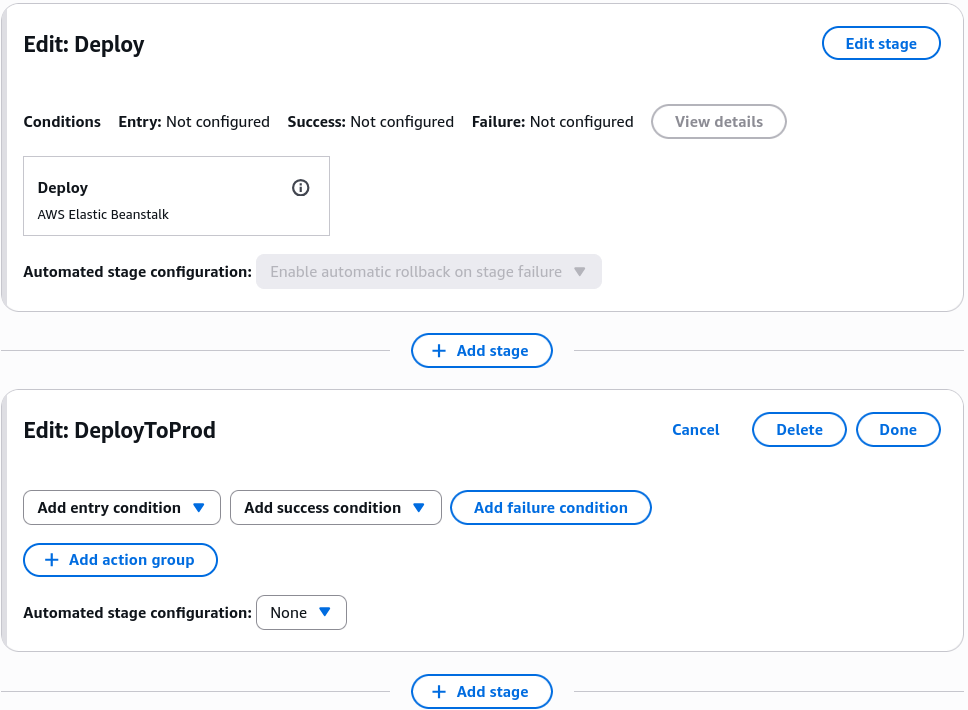
- Action Group A: The Sentry Gatekeeper (Manual Approval):
- Click Add action group inside the fresh stage block.
- Set the Action Provider dropdown explicitly to Manual approval ──► name the rule block
manual-approval. - Leave the notification variables at their default empty values (or link an explicit SNS ARN for email alert tracking) ──► click Done.
- Action Group B: The Production Rocket Launch (Sequential Deploy):
- Click Add action group directly beneath the manual approval slot to link a sequential dependency.
- Set the Provider to AWS Elastic Beanstalk ──► name it
DeployToProdBeanstalk. - Declare the explicit Input Artifact target point:
SourceArtifact(pulls the exact frozen code zip asset right out of the S3 store bucket). - Switch the environment parameter target pool explicitly over to
prod──► click Done ──► scroll to the top global nav and hit Save.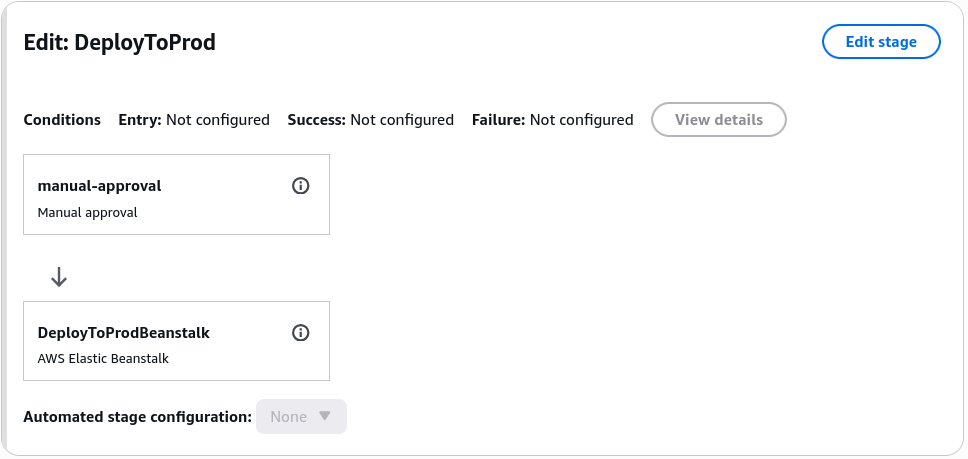
🧪 5. Executing the Full Lifecycle Rollout Test
- Trigger a Code Delta Shift: Head over to your source code repository, edit your
index.htmlfile layout, change the background color parameter string fromblueover togreen, and commit the delta payload straight to your tracking branch. - Phase 1 Execution (Dev Rollout): CodePipeline intercepts the push hook immediately. The Source block passes green, and the Dev stage auto-deploys, turning your development environment domain instant green.
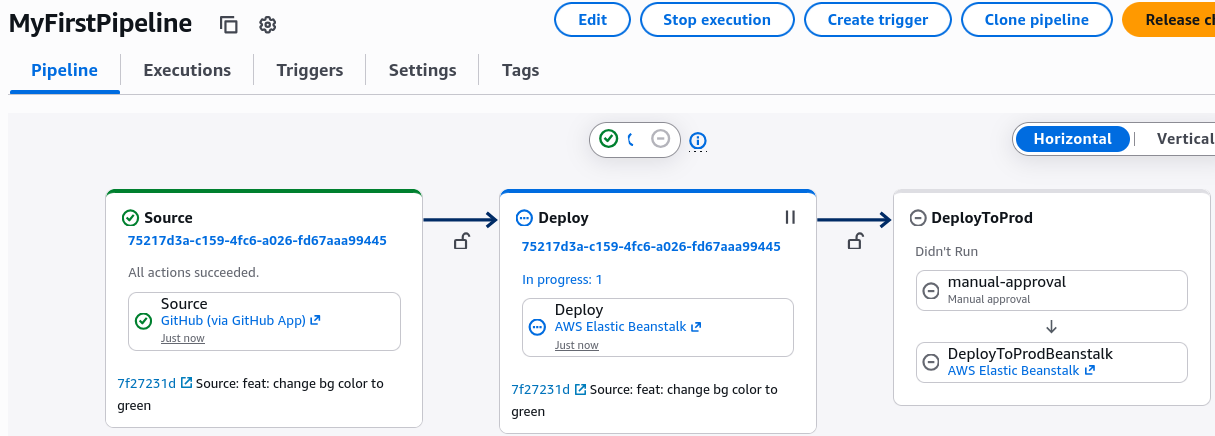
- Phase 2 Halting State (The Perimeter Lock): The execution pipeline hits the
DeployToProdstage and abruptly freezes, throwing a yellow alert badge stating Approval Review Required. The production web page stays safely stuck on its old green layout, bro.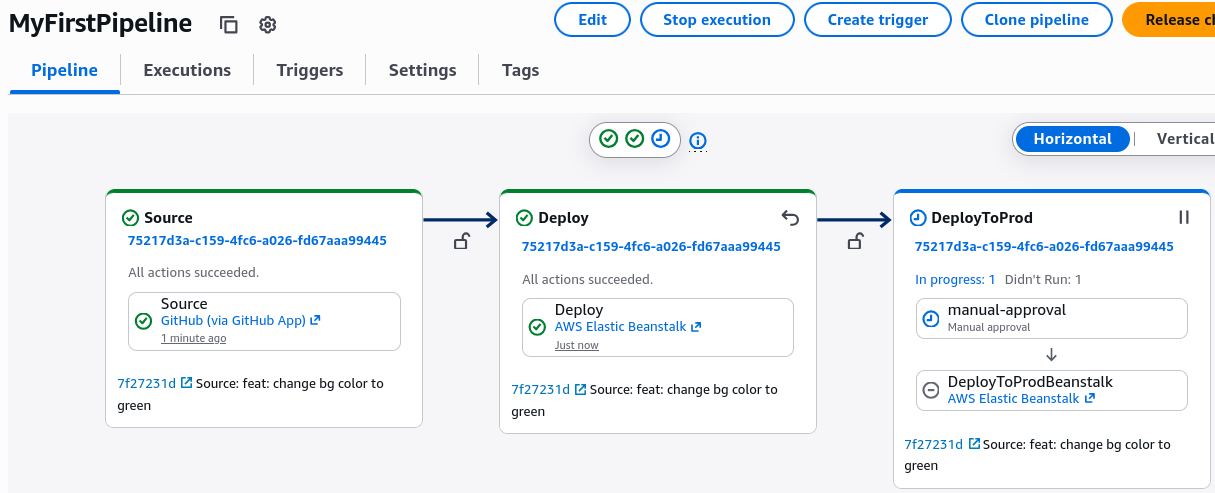
- Phase 3 Pushing to the Wild (The Production Release): Review your dev environment, verify the green layout looks flawless, click Review on the pipeline badge, type your deployment logs like "Looks good in green!", and hit approve.
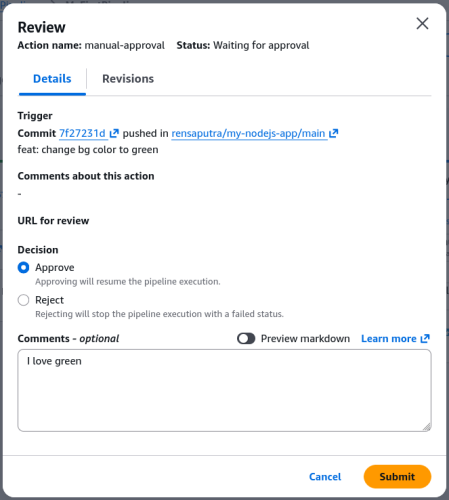
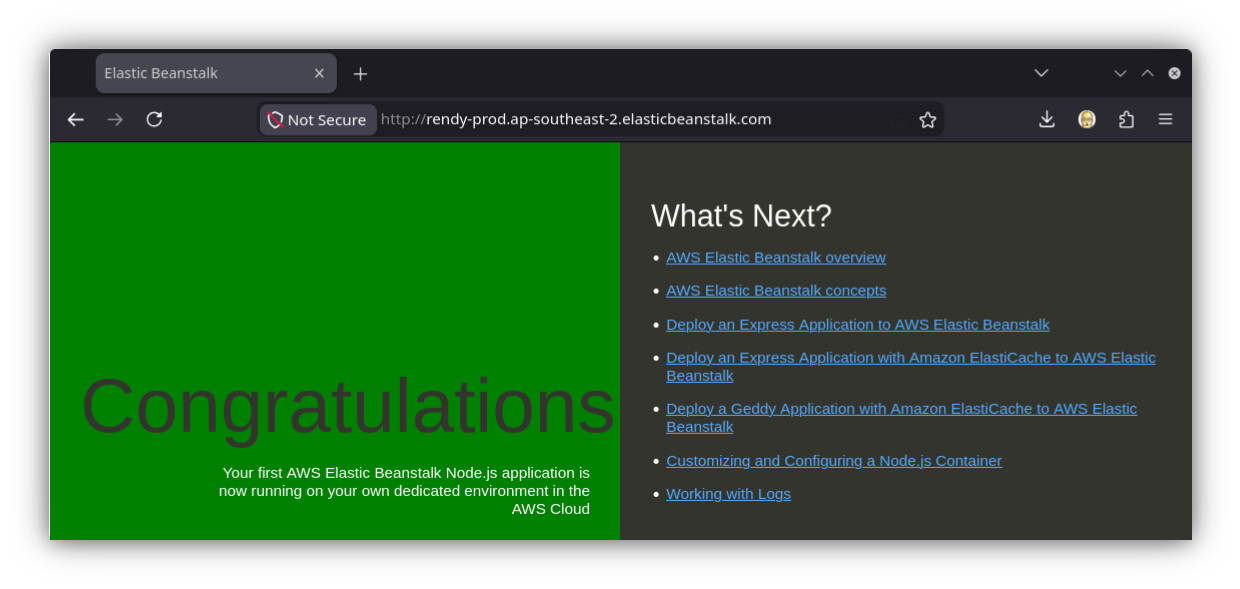
- The Win: The manual lock clears out, the sequential Beanstalk deploy action triggers, and your production servers gracefully roll over to display your brand new green page to the public web.
Exam Tips
- The Artifact Persistence Model: Notice how your production deploy action references the exact same raw
SourceArtifactstring, chief. This guarantees that the exact identical compiled binary payload that was verified inside your Dev sandbox is what flies into Production, avoiding any code mismatch drift between environments. - Sequential Delivery Architecture: Remember for scenario questions that multiple action groups stacked vertically inside a single pipeline stage block will run sequentially, demanding that the previous condition completely resolves with a success code before triggering the next line item.