CodePipeline - Hands On - Prerequisite
To show you how an enterprise continuous delivery pipeline can gracefully march updates across different isolation environments, Stephane’s lab has us spin up two separate, running Elastic Beanstalk environments inside a single application umbrella. One serves as our rapid Dev playground, and the other mimics our high-stakes, client-facing Prod system.
Hands on
🌐 1. Provisioning Environment Tier A (The Dev Playground)
- Launch the Control Center: Open up your AWS Management Console, search for Elastic Beanstalk, and click Create application.
- Establish the Corporate Umbrella: Name the application
my-first-web-appor something clean likemy-first-web-app-Beanstalk. - Select the Engine Platform:
- Set the Environment Tier to: Web server environment.
- Set the Managed Platform to: Node.js.
- Keep the Platform Version defaults at their latest stable release values.
- Dial in Low-Cost Capacities: Set the application code setting to Sample application, and switch the capacity preset over to Single instance to keep the running footprint inside the free tier pool.
- The Review Shortcut: Click Next through the networking and security access cards (you can completely skip setting up an EC2 key pair for this testing run). Hit Skip to review ──► scroll to the bottom ──► click Submit.
- The Succeeded Check: Wait a few minutes while the cloud orchestrates your EC2, Auto Scaling, and S3 resources until the status ring shines a bright, healthy Green.
🚨 2. Provisioning Environment Tier B (The Production Target)
-
Mount the Sibling System: Back inside your active Elastic Beanstalk application dashboard workspace, locate the actions panel on the top right and click Create new environment.
-
Differentiate the Workspace Target: Select Web server environment, and name this secondary cluster explicitly:
prod. -
Match the Platform Configs: Re-apply the exact same runtime environment variables: Select Node.js, choose the latest image version, and click Sample application.
-
Push the Build Live: Click Next ──► click Skip to review ──► scroll to the bottom and hit Submit.
-
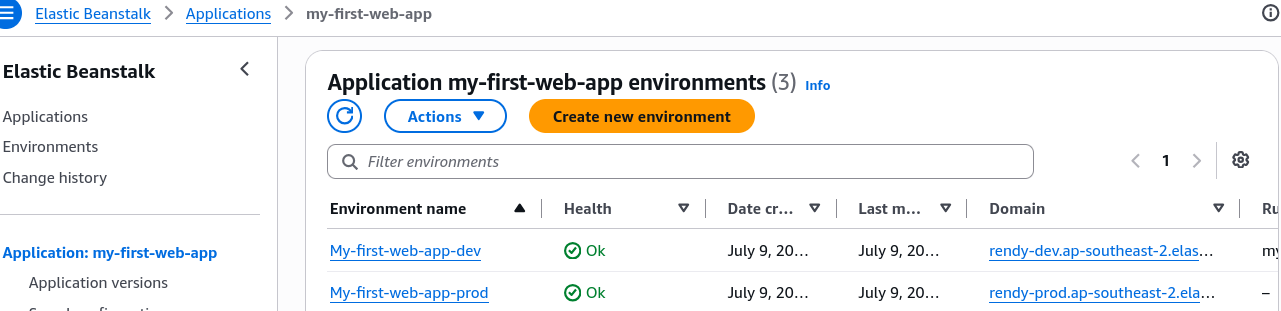
The Completed Setup Check: Once this second process bakes cleanly, you now have two independent target domains up and running over the live web, chief!
🛑 3. The Absolute Essential Clean-Up Notice
THE PROVISIONED CHARGE WARNING: Elastic Beanstalk automates provisioned server compute infrastructure. Even though we are running micro-tier configurations, you are being billed 24/7 for the background EC2 instances as long as these environments stay alive. The moment we wrap up the CodePipeline labs at the end of this module, remember to head straight back to your environments dashboard, hit actions, and select Terminate environment to freeze all background billing meters completely.