SAM - Hands On
Running our very first native serverless template compilation inside AWS CloudShell is an absolute milestone play, bro! 🐿️⚡ The beautiful thing about CloudShell is that it ships with both the SAM CLI and standard Docker runtime layers completely pre-baked, meaning you don't have to fiddle around with annoying local environment PATH variables just to compile your infrastructure blueprints.
Hands On
🐿️ 1. Initializing the Project Blueprint
- Kick Off the Shell Engine: Hit the CloudShell icon on the top universal console navigation bar to initialize your terminal runtime wrapper.
- Spit the Init Command: Launch the interactive configuration wizard by entering
sam init.
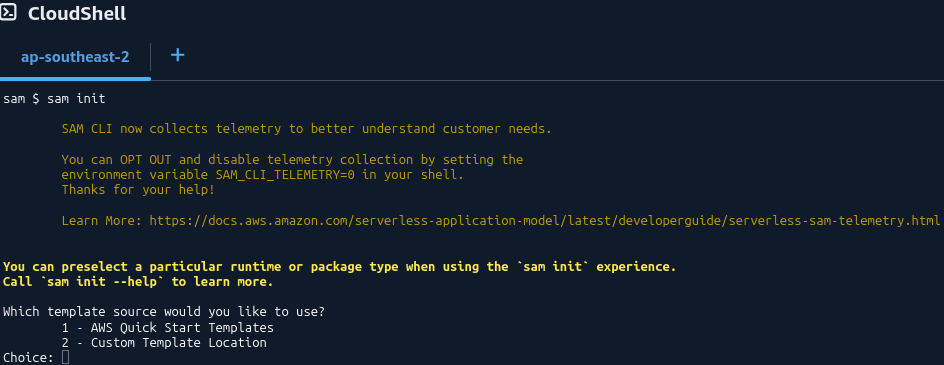
- Navigate the Options Matrix: Select the following menu choices to stage the template:
- Template Source: Choose
1(Quick Start Template). - Template Architecture: Choose
1(Hello World Example).
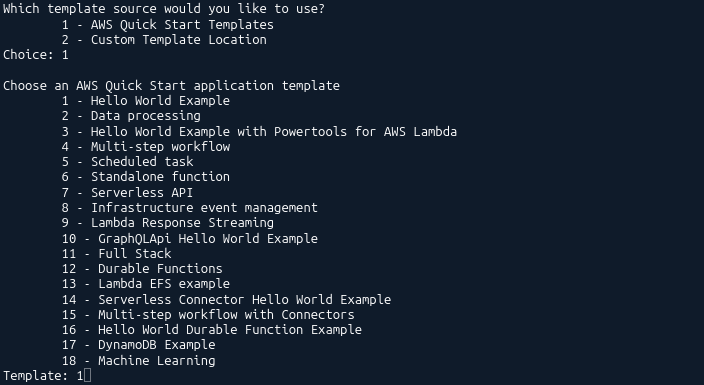
- Runtime Lane: Select your target programming runtime (e.g., Python with a zip packaging format). I choose
nodejs24.x and zipfor this example.
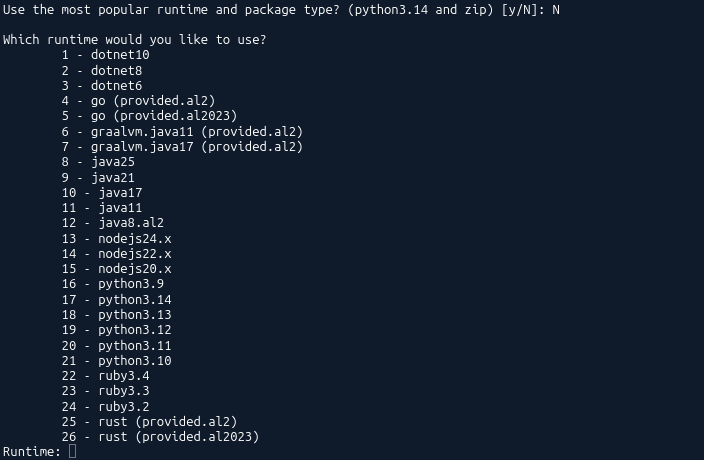
- Telemetry Switches: Toggle options like X-Ray tracing, CloudWatch Insights, and JSON formatting to
N(No) to keep the baseline resource testing stack clean. - Project Naming: Type
sam-appand hit enter.
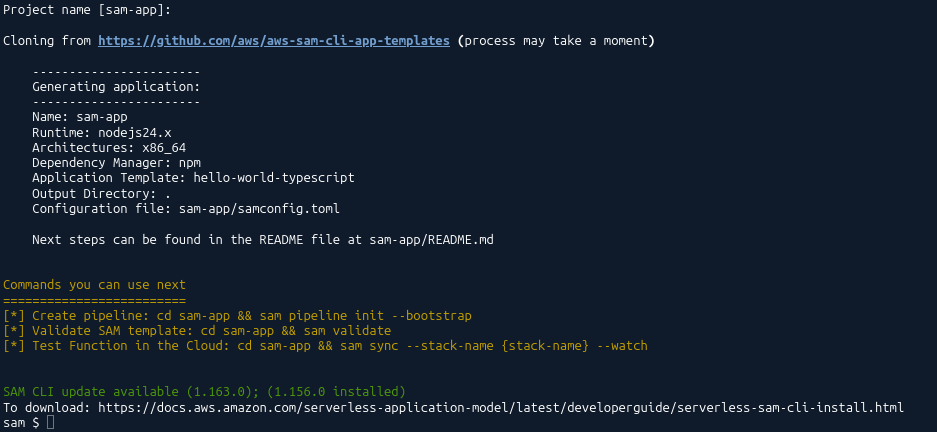
- Template Source: Choose
- Enter the Runway Directory: Move into your fresh project canvas folder:
cd sam-app.
📄 2. Auditing the Core App Structural Assets
Run an ls or file scan to inspect the three mission-critical files that make up your application stack:
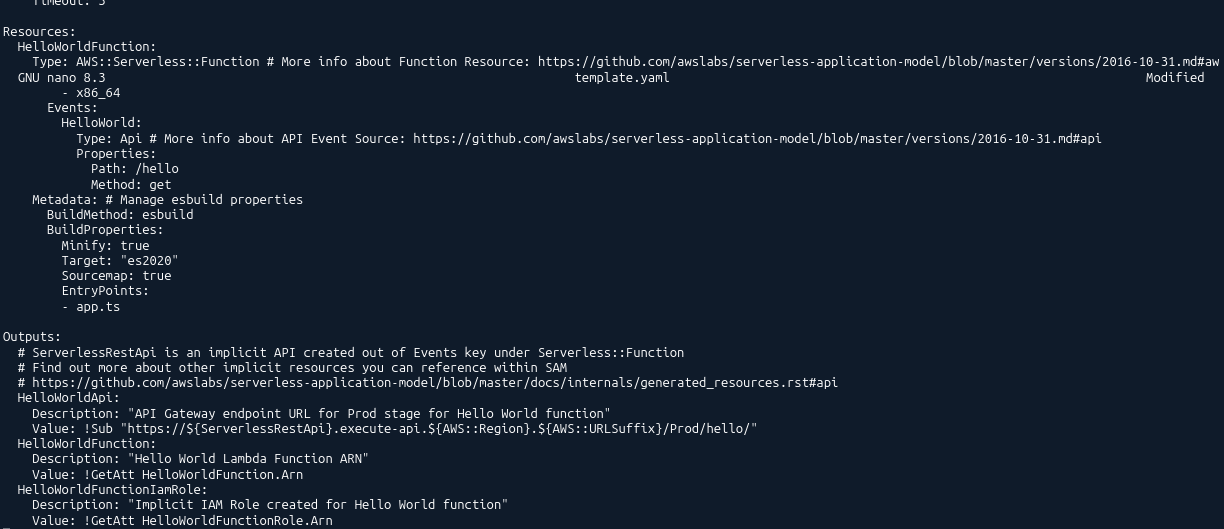
hello_world/app.ts🧠: The operational backend logic. It contains a standard execution handler method that takes a JSON inbound payload and returns a clean HTTP status wrapper carrying the message string:"hello world".samconfig.toml🎛️: Holds your persistent CLI execution properties, deployment parameter hooks, bucket routes, and global variables.template.yaml📜: The holy grail template. It features the mandatoryTransform: AWS::Serverless-2016-10-31header macro string and provisions anAWS::Serverless::Functionresource. Under itsEvents:configuration card, it dynamically hooks up an API GatewayApiGET trigger route natively!
🔨 3. Fixing Runtime Drift and Compiling (sam build)
-
Fixing NPM Authentication Issue: When you try to run
sam buildafter following the previous CodeArtifact Hands-On, you may encounter an error like this:Error: npm ERR! code E401npm ERR! 401 Unauthorized - GET https://registry.npmjs.org/@aws-sdk%- You need to delete the registry entry in your
.npmrcfile. Run the following command to remove it:
sed -i '/registry=https:\/\/registry.npmjs.org/d' ~/.npmrc - You need to delete the registry entry in your
-
Execute the Compiler Container: Spin up your local build runner:
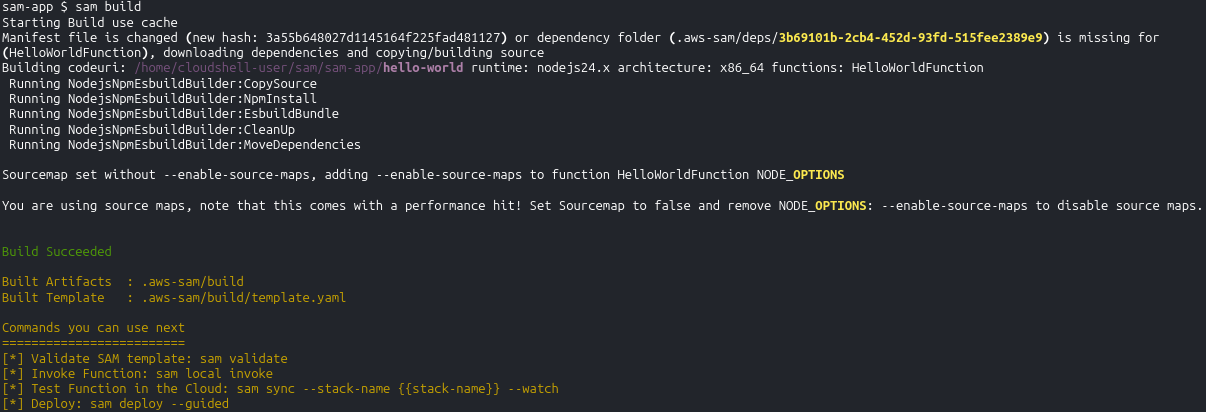
sam buildThe Succeeded Check: The compiler creates a hidden local workspace directory named
.aws-sam/build/, compiles your code assets, down-selects your dependencies, and prepares your final CloudFormation blueprint stack!
🚀 4. Triggering the Cloud Rocket Launch (sam deploy)
-
Engage the Guided Installation: Execute the deployment command with the active guided wizard flag:
sam deploy --guided -
Answer the Pipeline Prompts: Roll through the deployment questions like a true pro, chief:
- Stack Name: Keep the default (
sam-app). - AWS Region: Keep your baseline regional default.
- Confirm changes before deploy: Toggle to
Y(Yes). - Allow SAM CLI IAM role creation: Toggle to
Y(Yes) to let the system generate access policies. - Disable Rollback: Toggle to
N(No) to keep auto-recovery armed. - HelloWorldFunction may not have authorization defined, Is this okay?: Toggle to
Y(Yes) to keep the testing endpoint open to the web. - Save arguments to configuration file: Toggle to
Y(Yes).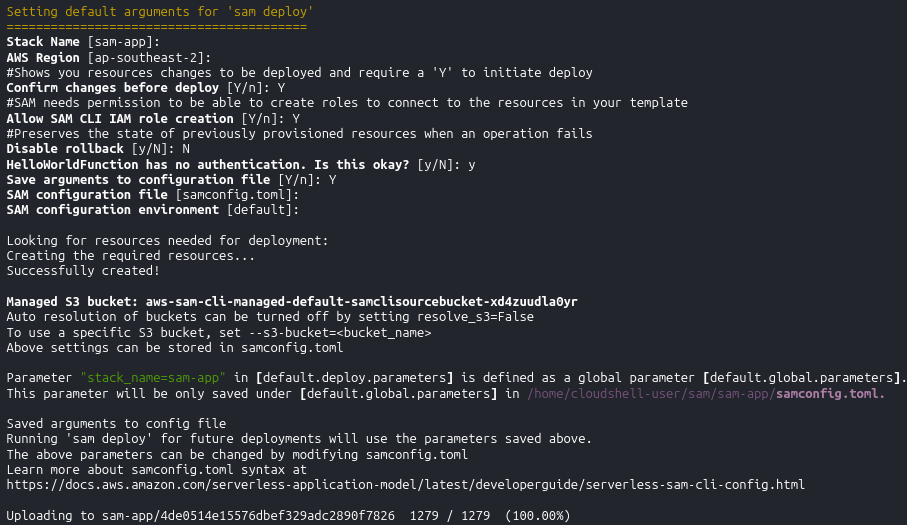
- Stack Name: Keep the default (
-
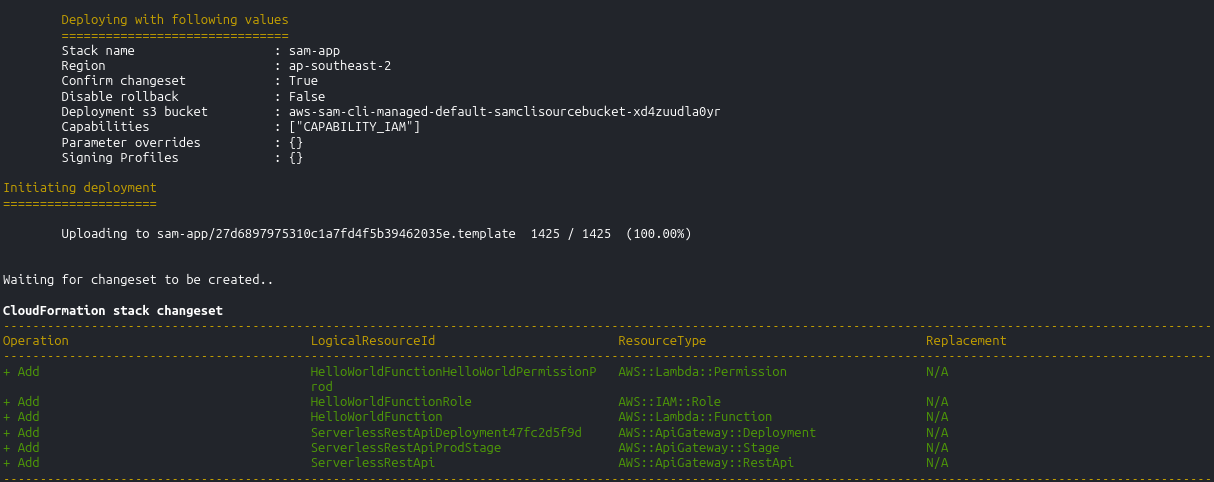
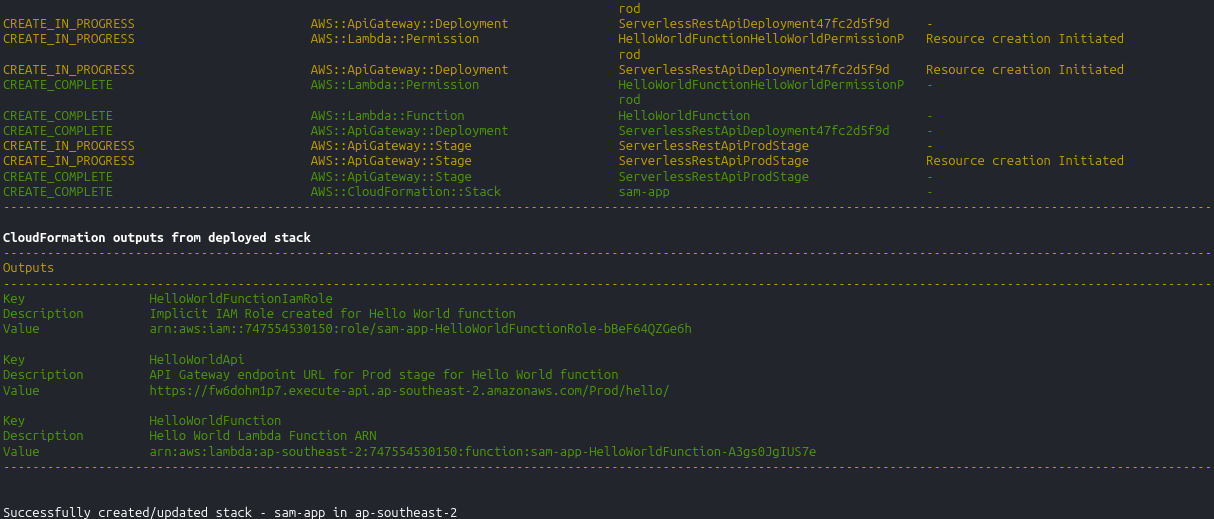
Approve the ChangeSet: SAM automatically zips your assets, pushes them to a secure background S3 storage bucket, and prints out a visual CloudFormation ChangeSet list detailing the precise resources it's about to build. When prompted with
Deploy this changeset? [y/N]:, smash thatykey.
🏆 5. Verifying the Live Production Endpoint
-
Capture the URL Output: Once the stack completion logs finish rolling, the terminal prints out a clean Outputs card displaying your live, active production API Gateway endpoint string. Copy that URL!
-
Hit the Live Web: Execute a rapid API call from your terminal over the live web:
curl <YOUR_COPIED_API_GATEWAY_URL> -
The Victory Check: The terminal instantly prints out the JSON response:
{"message": "Hello World"}.
You just provisioned a full-stack, secure serverless compute architecture with path-based API Gateway routing filters using only a few basic commands.