EFS Hands-On
Key Takeaways
The Core Lifecycle Setup
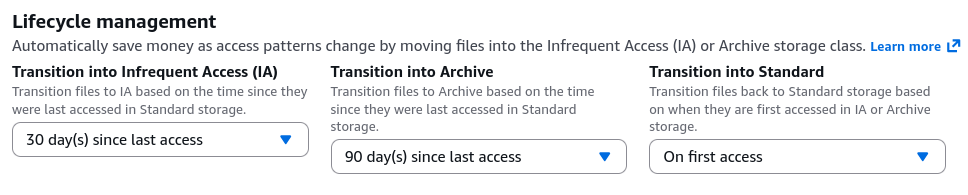
- The Restorative Logic: Stephane demonstrates setting up policies to transition files into Infrequent Access (IA) or Archive tiers based on age (e.g., 30 or 90 days of no activity). Critically, you can set an option to transition files back to Standard on first access if you expect them to be heavily reused once woken up.
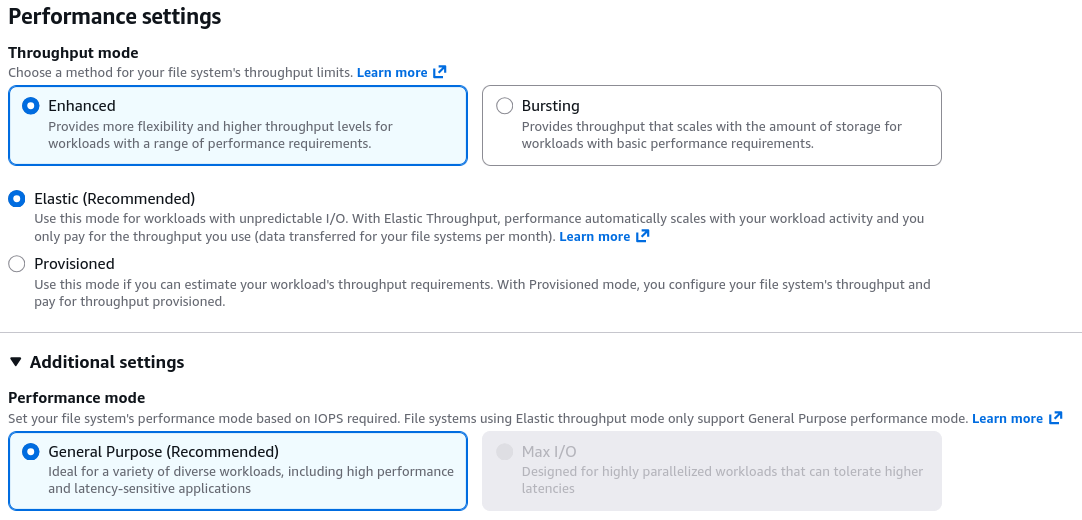
- Throughput Decoupling: Stephane clarifies the layout of the three modes: Bursting (scales with storage size), Provisioned (you pay to lock in a specific baseline speed), and Elastic (the modern recommended default that scales instantly from 0 to hundreds MB/s - perfect for unpredictable I/O).
The Security Group Setup
- The inbound rule: For your EC2 instance to talk to EFS, the EFS mount targets must allow NFS traffic on port 2049.
- Security Group referencing: instead of whitelisting specific IP blocks, AWS automatically creates an EFS Security Group (
efs-sg-x) that whitelist the EC2 instance's security group ID as the source.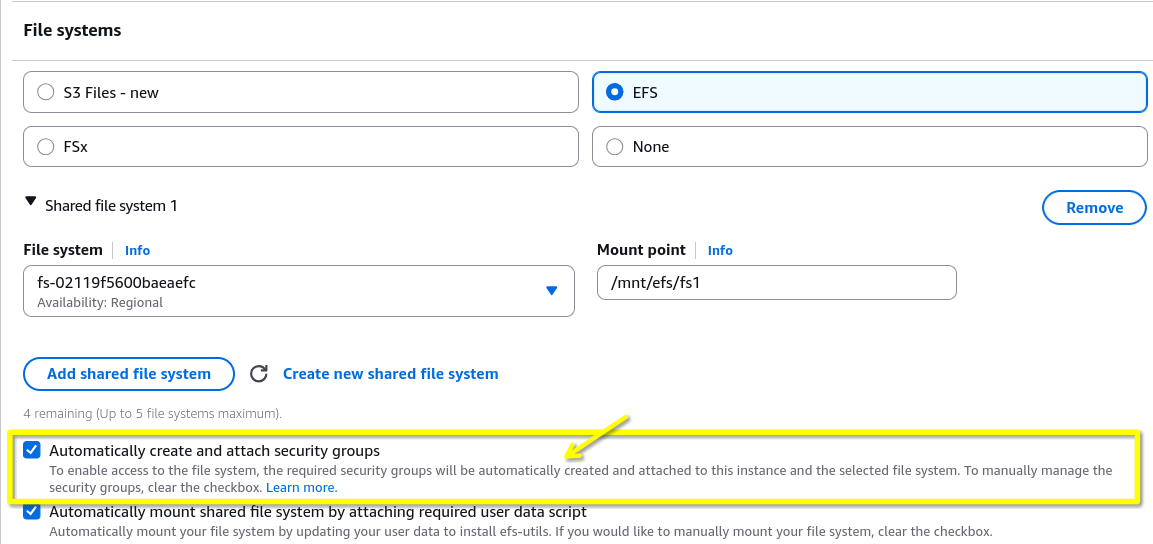
Automated bootstrapping via EC2 launch
- In the past, you had to log into Linux and type out mount commands manually.
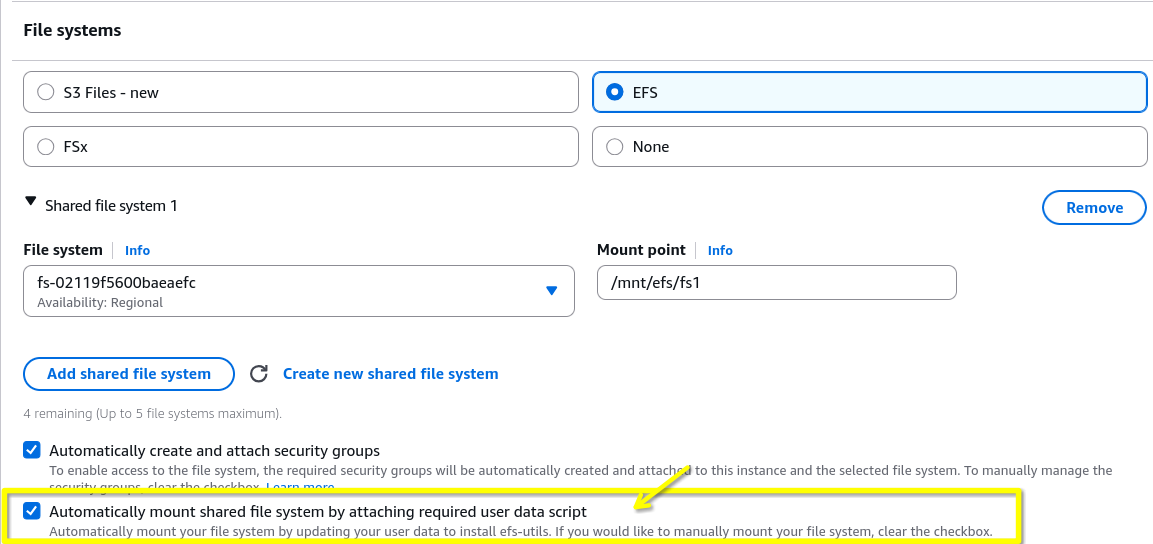
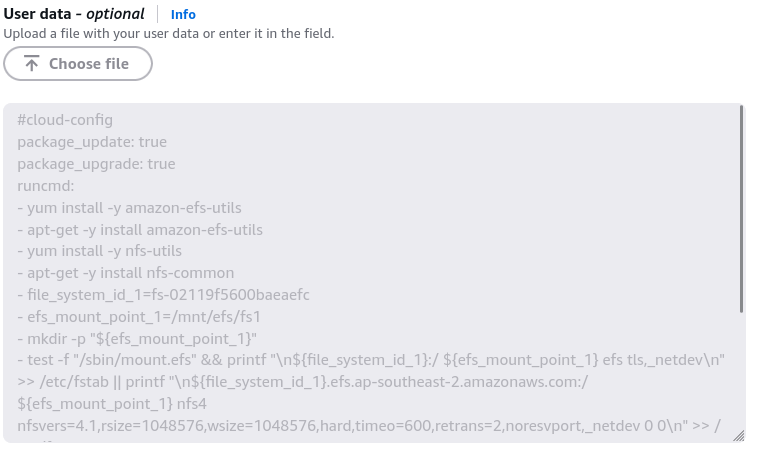
- Now, you simply assign your subnet, check the "Automatically mount EFS file system" box in the EC2 wizard and define a mount point (like
/mnt/efs/fs1). - AWS handles the heavy lifting by injecting the exact required mount scripts directly into the instance's User Data automatically.
Cross-AZ Live Verification
We can proves that EFS is truly multi-AZ by launching two EC2 instances in different AZs, mounting the same EFS file system on both.
- Instance A: Creates a new instance called
instance-a, In the network settings, select the Subnet that belongs toap-southeast-2a. Attach the EFS file system that you have created before and specify the mount point (e.g.,/mnt/efs/fs1).- After the instance is up, SSH into it and create a new file
echo "hello world" > /mnt/efs/fs1/hello.txt - Instance B: Create another instance called
instance-b, but this time select the Subnet that belongs toap-southeast-2b. Attach the same EFS file system and specify the same mount point.- After the instance is up, SSH into it and check if the file created by
instance-ais visible ininstance-b
cat /mnt/efs/fs1/hello.txt - After the instance is up, SSH into it and check if the file created by
- The Takeaway: This confirms true concurrent multi-AZ reading and writing over a POSIX-compliant file system.
Clean-up
Stephane reminds us to clean up resources to avoid stray costs:
- Terminate both EC2 instances (
instance-aandinstance-b). - Delete the EFS file system
- Delete any security groups that were automatically created for EFS (e.g.,
efs-sg-xandinstance-sg-x)